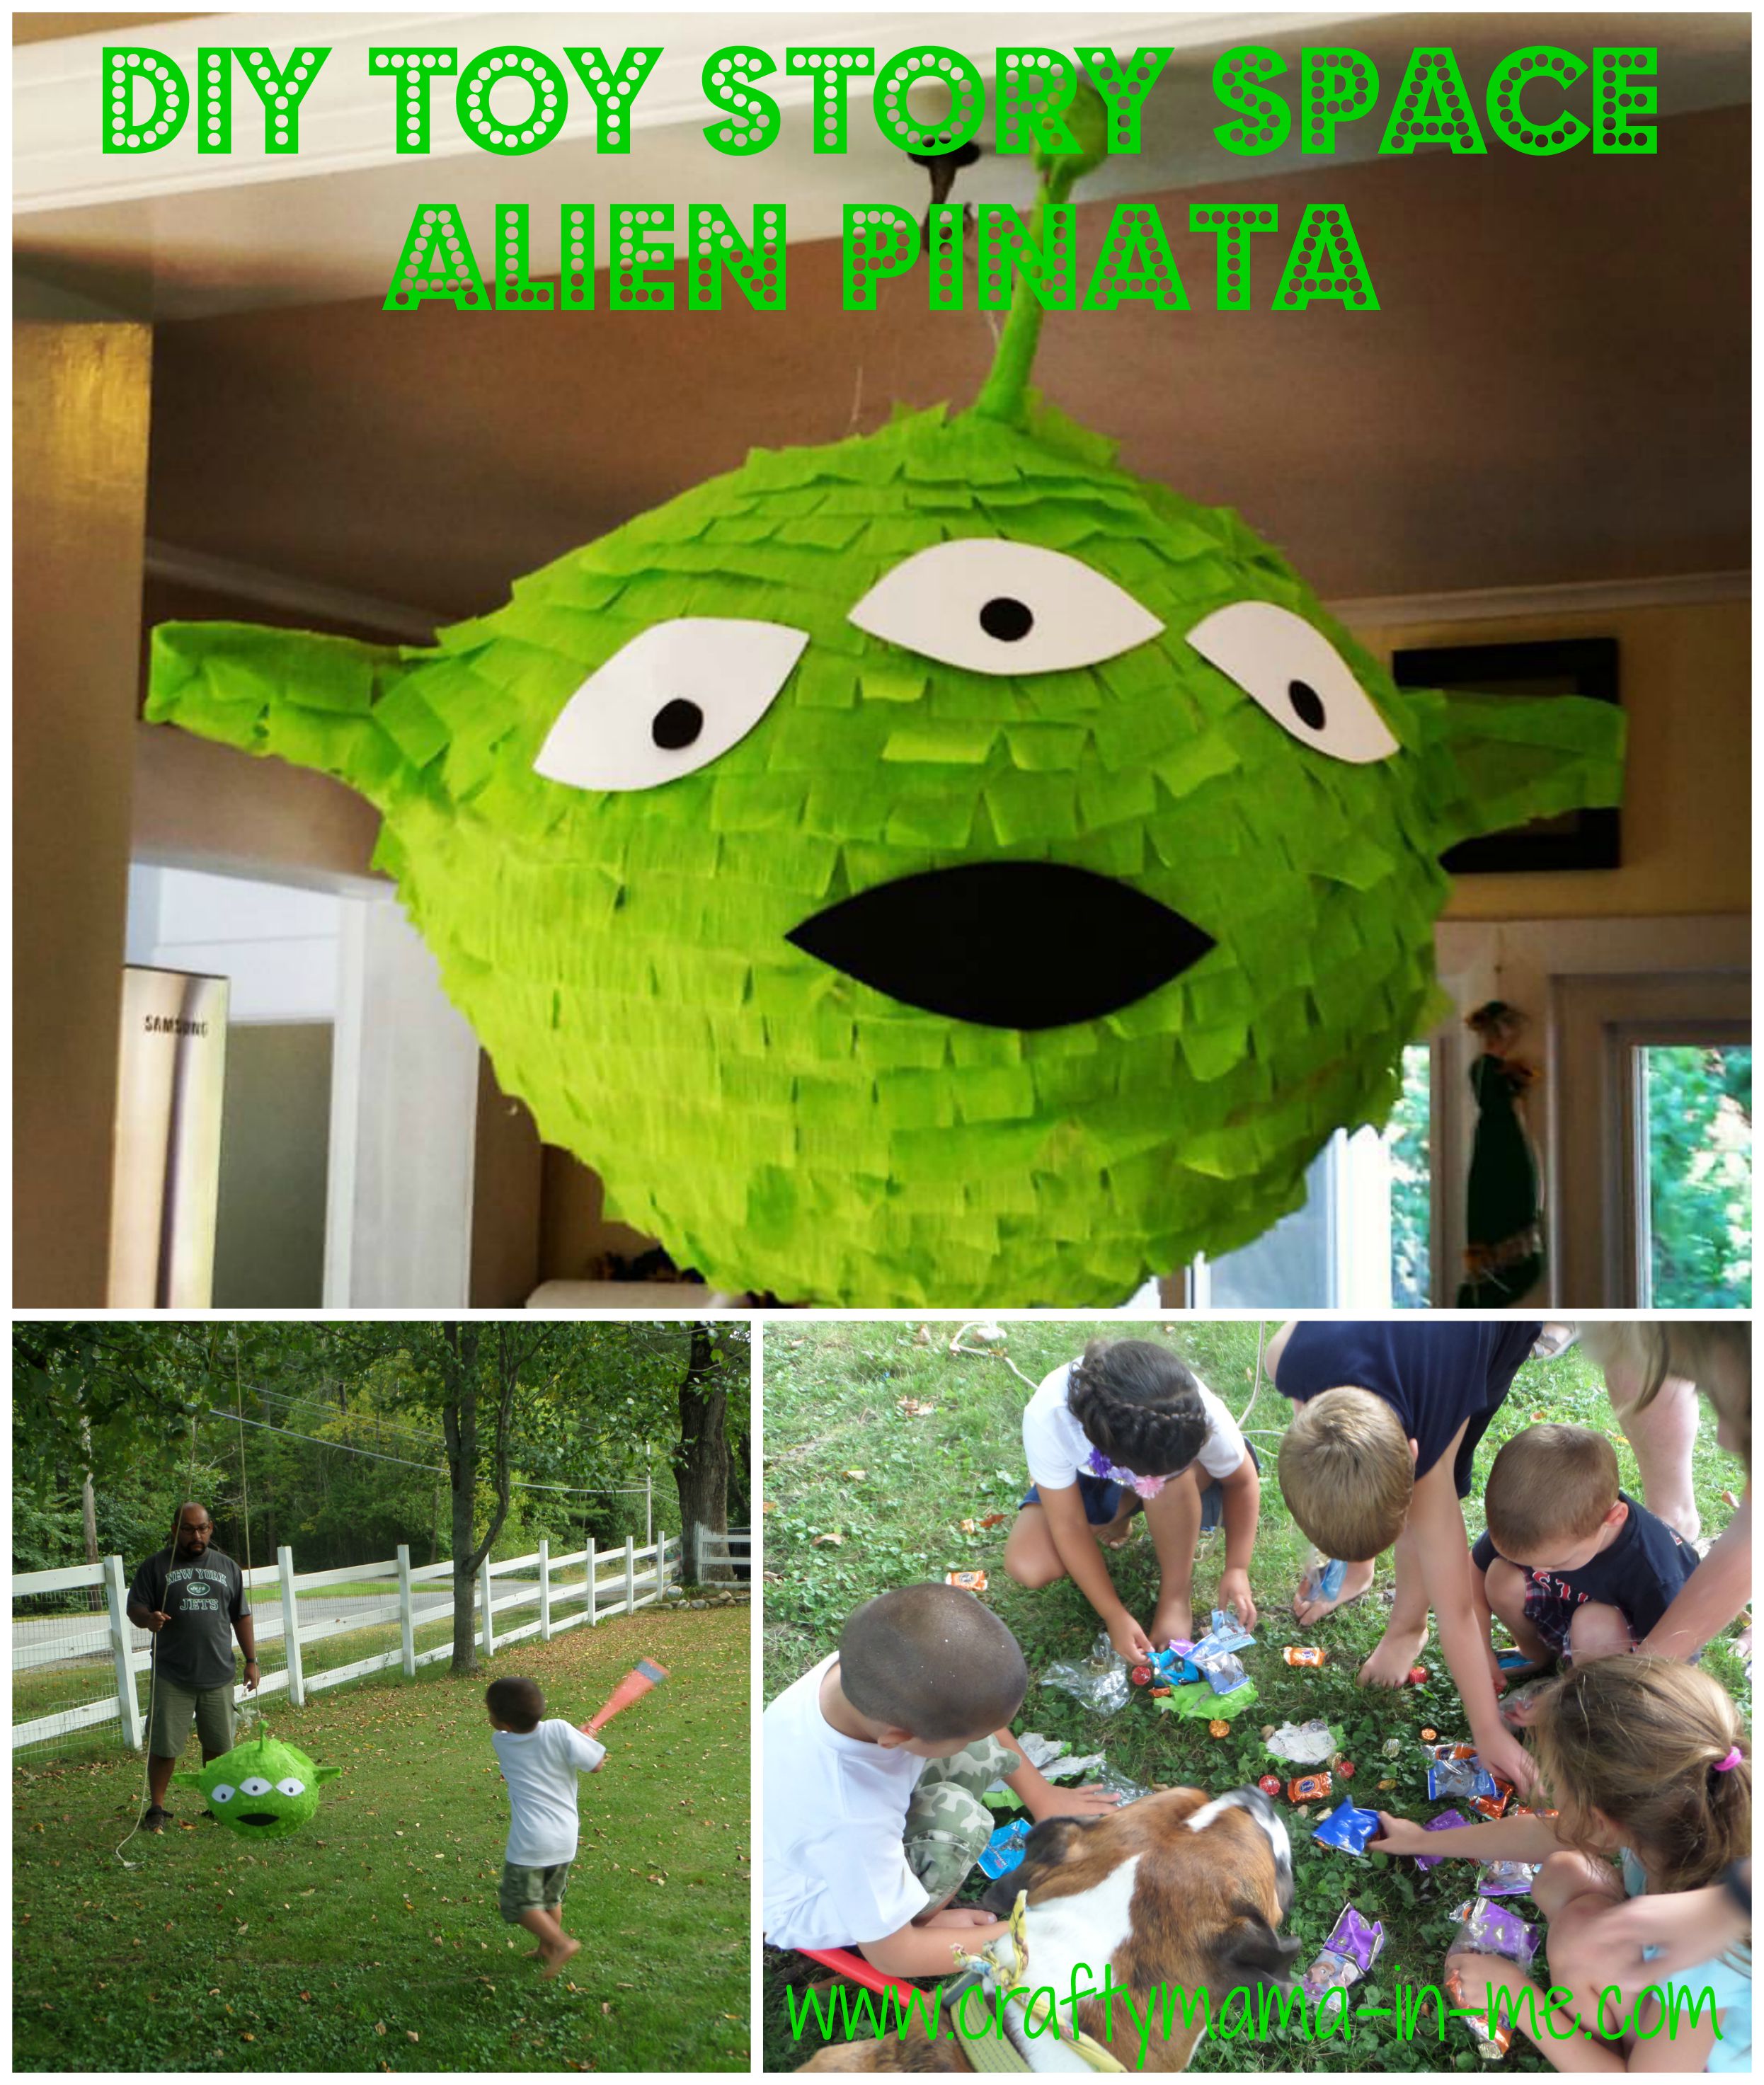
DIY Toy Story Space Alien Piñata
Buddy requested a Toy Story themed birthday this year. The two of us searched on Pinterest for ideas for a piñata that we could make. We settled on making a Space Alien (to be known in this post as a Pizza Planet since that is what Buddy calls them). This pin is what inspired our piñata. I am going to walk you through the steps to create your own piñata at home and save some money.
Materials Needed:
- Punching balloon
- Newspaper
- Paper mâche paste (equal parts flour and water)
- Crepe paper
- Hot Glue gun/glue sticks
- Cardboard (for ears)
- Scissors
- 1 pencil
- 1 piece of tinfoil
- Wire for fashioning a hanger
- Rope
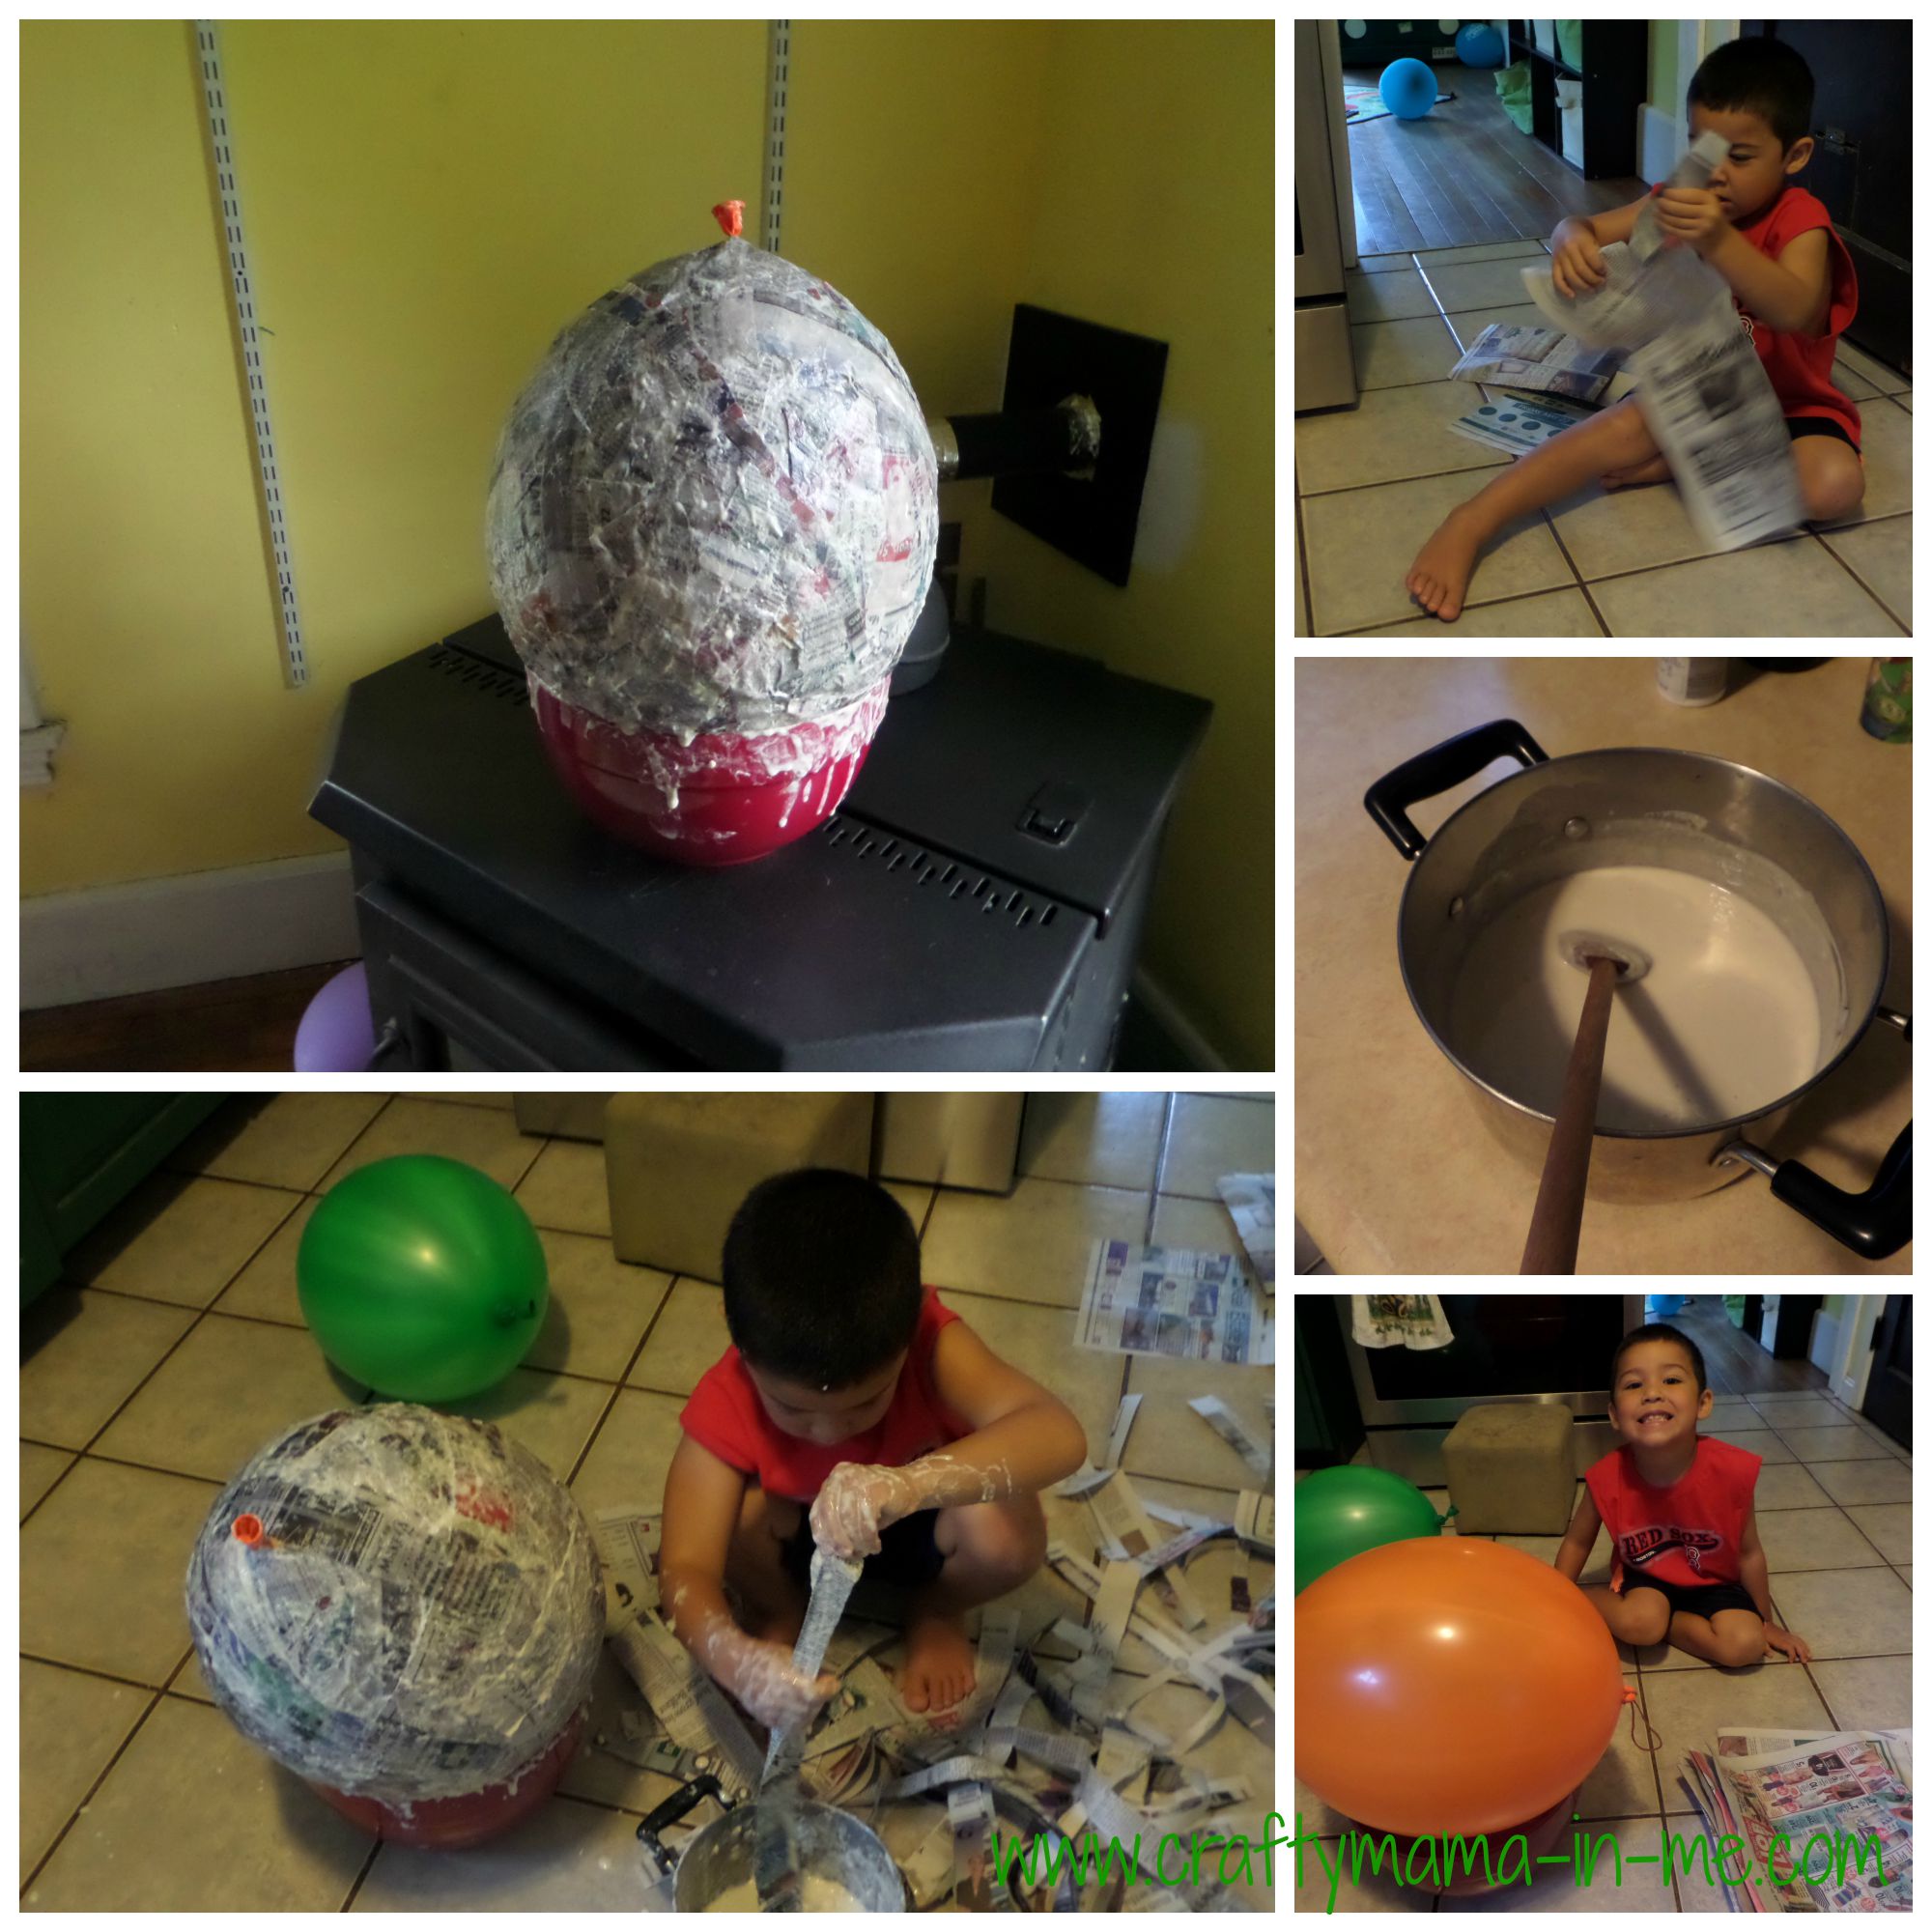
Phase 1 – Paper Mâche (KID FRIENDLY)
- Rip the newspaper into long strips
- Mix up paste – equal parts flour to water – I used 2 cups of each and added a little additional water to thin the paste out. Mix until most clumps are gone
- Blow up the punching balloon to the desired size of your final piñata
- Place inflated balloon on a bowl to hold it
- Dip newspaper in the paste – remove excess paste with your fingers and apply strips in a flat layer to the balloon
- Repeat until the balloon is totally encased – the more layers you apply – the harder the piñata will be to break
- Place somewhere to dry – if it is a sunny day out you could put it outside during the day and bring it back in at night.
- Let the piñata dry for at least 3 days – possibly longer depending on the weather (humidity doesn’t allow the paste to dry quickly)
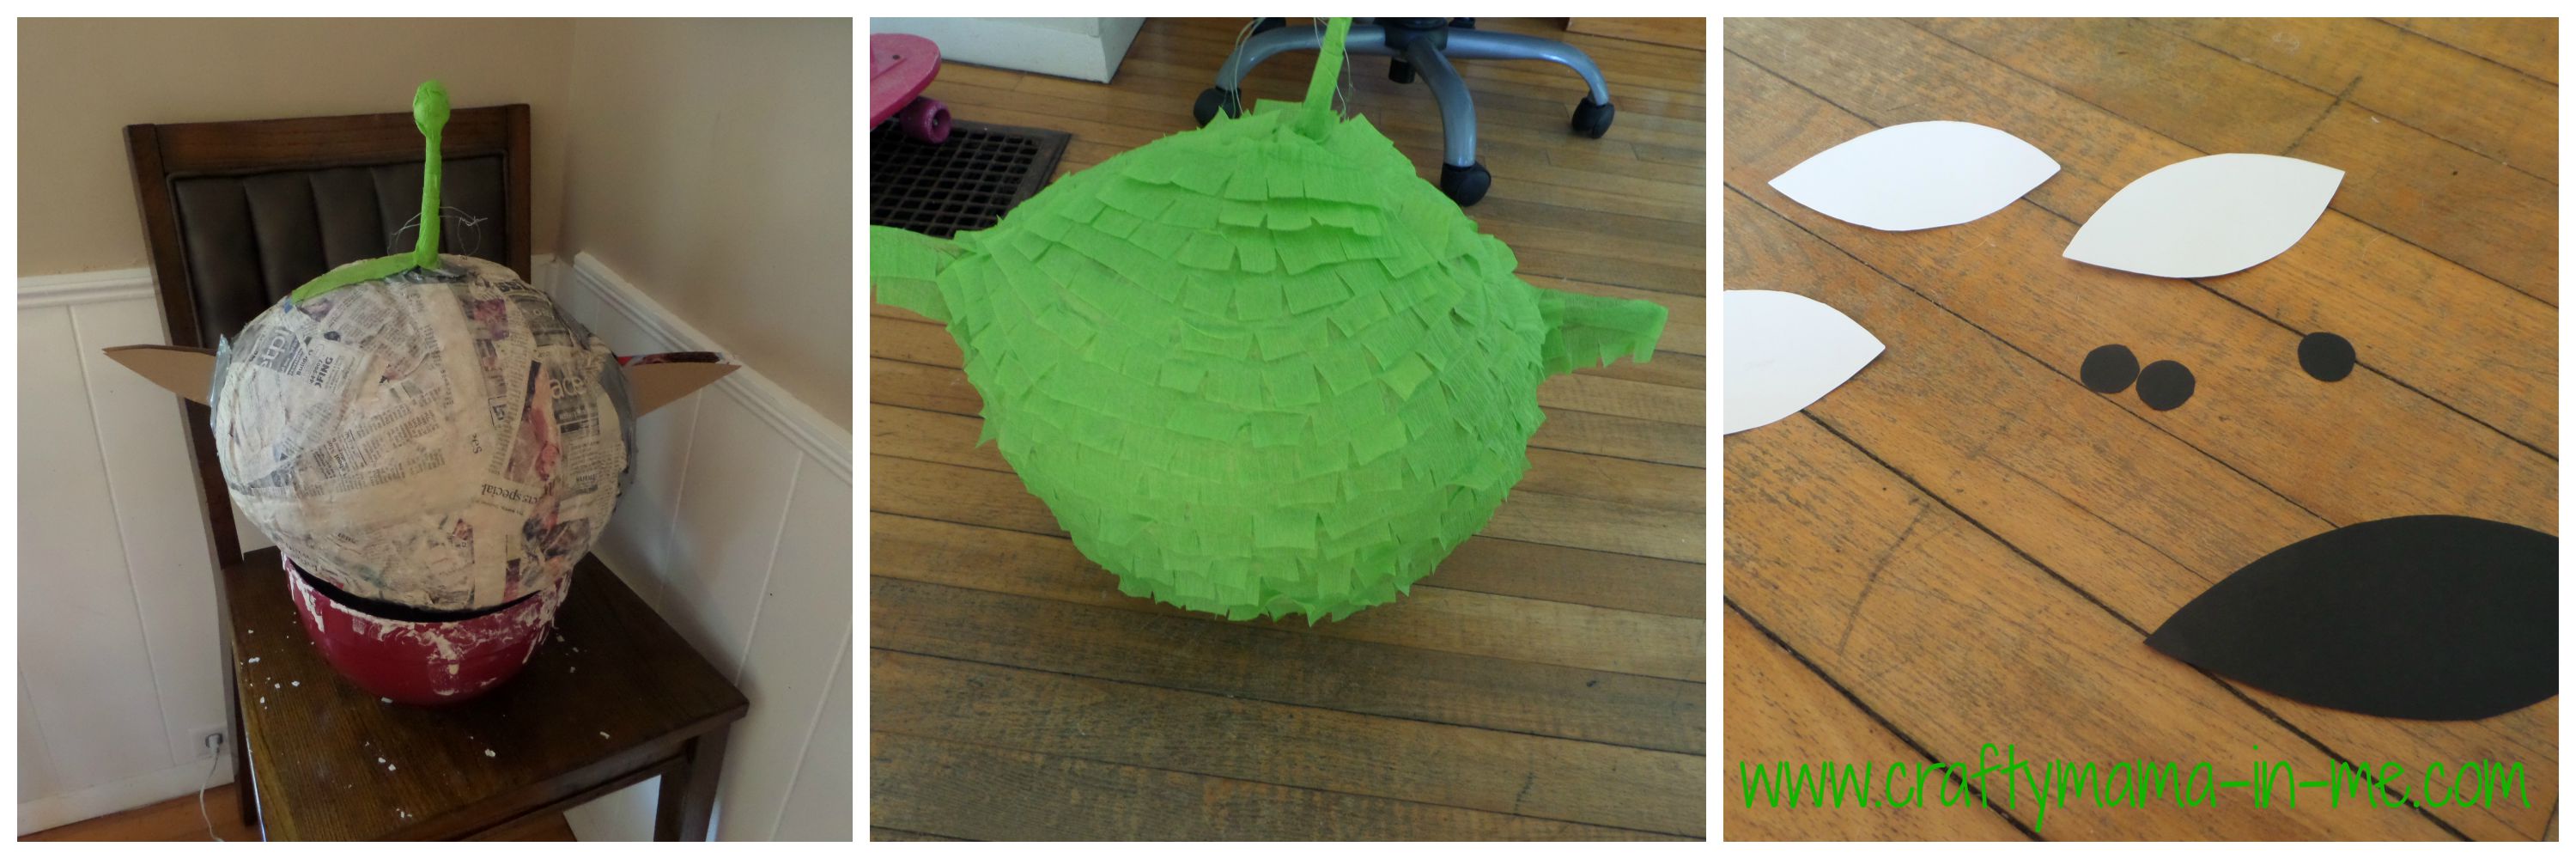
Phase 2 – Prep Work
- Once dry determine where you will cut a hole to insert the prizes (we made a small square in the back and covered it with duct tape once the prizes were inserted ***KID FRIENDLY ACTIVITY)
- Fashion a hanger on the top of the piñata (my husband did this for me)
- Drill 4 small holes into the top of the pinata
- Insert wire through the holes and twist together at the top
- Make antenna
- I used a pencil with a ball of tin foil on the top
- Use a knife to make a small hole for the antenna (in front of the hanger)
- Duct tape the pencil to the top of the piñata
- Make ears
- Use thin cardboard to trace four ear shaped pieces
- Bend the end of each piece of cardboard to create a 1/2 inch flap
- Using duct tape secure the flaps to the piñata (flap out) – leave 1/2 inch space in the middle of two ear pieces to make the ears 3-D instead of flat
Phase 3 – Decorating
- Plug in hot glue gun
- Start unrolling crepe paper
- Use scissors and create notches on the bottom of the crepe paper roughly 1 inch apart across the entire length (this creates volume and makes the piñata look more like its store bought)
- Start applying already notched crepe paper
- Start on the bottom of the piñata and work around the circumference
- Apply a line of glue to the piñata – stick on crepe paper
- As needed stop and notch more crepe paper
- When you get to the ears apply the crepe paper down the length and wrap around the other side pulling the tips of the two pieces of cardboard together
- Around the antenna and hanger you may have to cut the crepe paper and start again with a new piece – glue the overlap down so it doesn’t flap
- For the antenna wrap the crepe paper around the pencil and tinfoil ball
- Cut three eyes out of white cardstock
- Cut three pupils and a mouth out of black cardstock
- Adhere the pupils to the eyes with hot glue
- Adhere the eyes and mouth directly to the piñata surface
Phase 4 – Admire your completed Piñata!
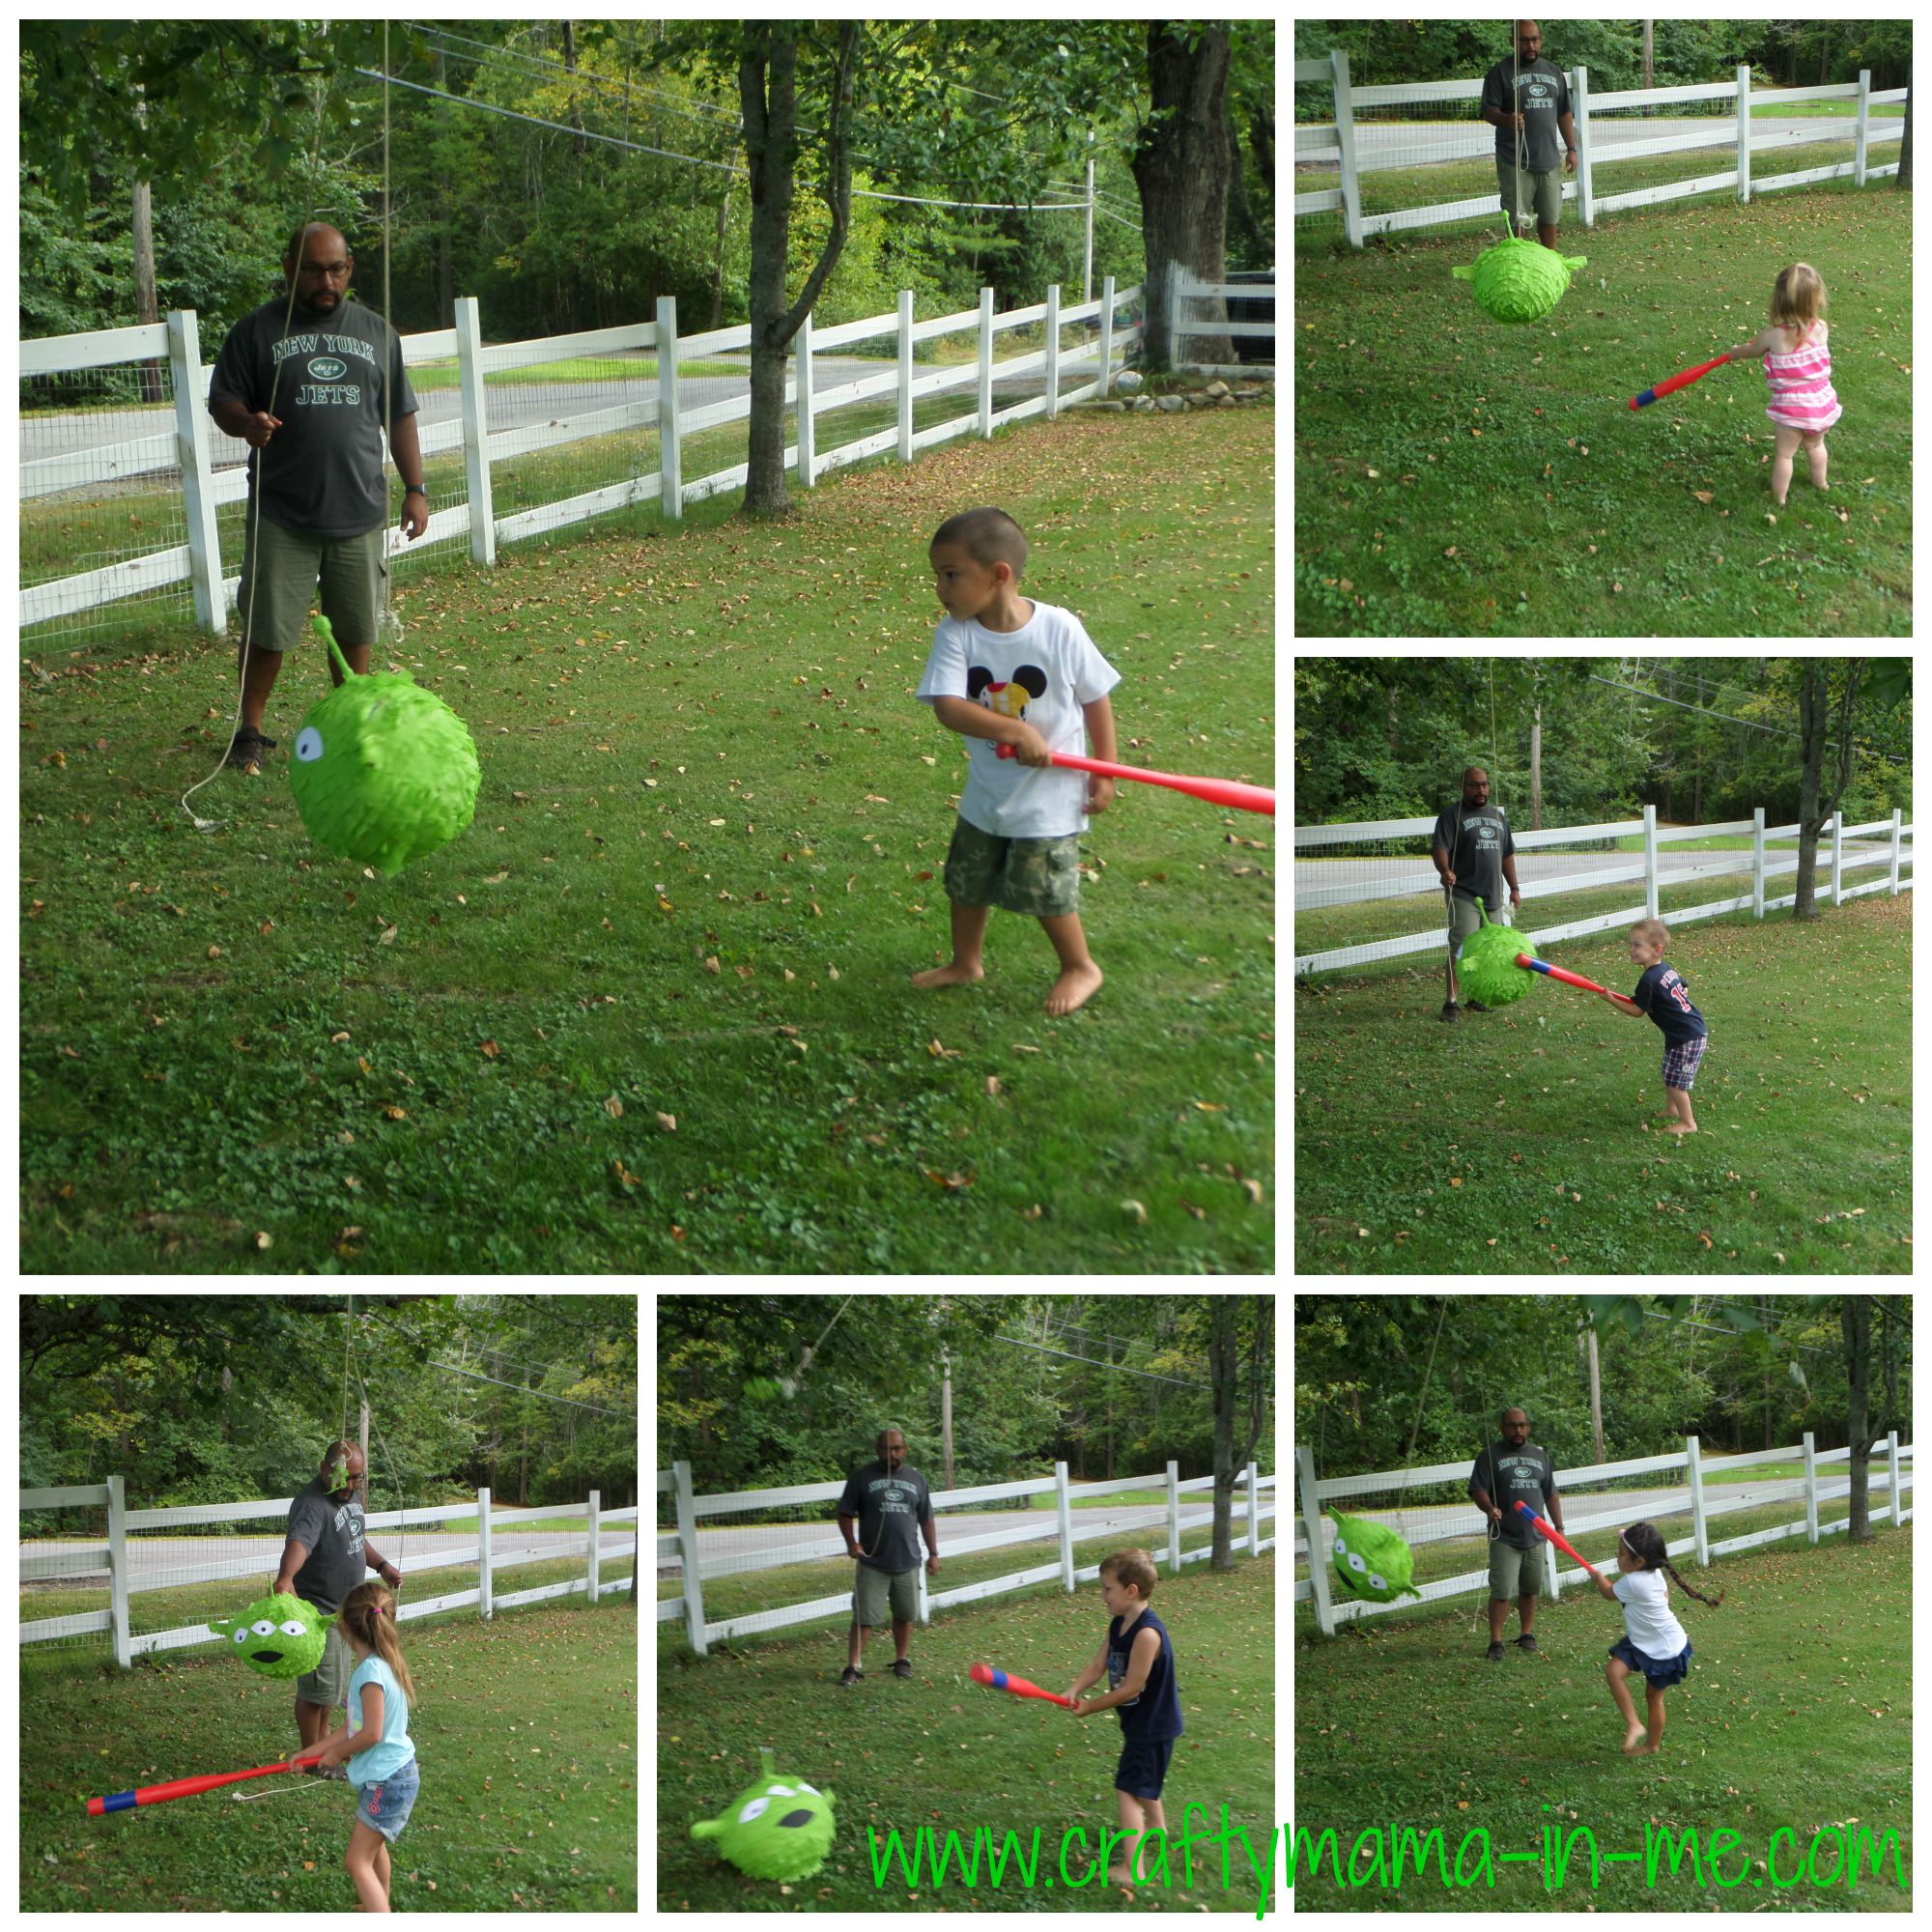
Phase 5 – Watch children gleefully kill your beautiful Piñata!
Stay tuned this week for more details of Buddy’s Toy Story birthday party.
View Comments (72)
This idea seems so simple, yet looks fabulous - I love it! Those little alien dudes have always been my favorite part of the movie - "The claw decides who will stay and who will go..."
thanks! my mom makes pinatas with all of the grandkids for the 4th of July and I decided it was a good idea to try them myself! Pinatas are very expensive at the store and this way you can make it whatever you want!
You truly are a crafty mom. Your instructions are clear and easy to follow . I love your photos too ! This activity brings back memories of my girls ' birthdays
Thank you! I really try to do fun things with them and make fun memories :)
That pinata turned out so cute!!! You did great with decorating it!! How old is your son - so fun that he was able to help. We love toy story and will probably have to have a toy story themed party at some point.
- Betsy @ AMother'sRoad.com
My son just turned four! I love looking for projects that we can work on together - especially when it comes to prepping for their parties. Tomorrow I am posting the roundup of all of the Toy Story ideas from the party so take a look - it might come in handy someday!
What a great hands-on party treat. I think it's great that you were able to let Buddy help you make it. He'll have such great memories of the party and preparing for it.
Thanks! Pinatas are so much fun for the kids. By making our own we saved money and created memories!
What a great idea for getting the kids involved in the party planning. Your pinata turned out so cute!
Thanks! The kids have so much fun and feel such a sense of ownership when they get to help pick what they have at their party and sometimes help make items!
I had no idea a Pinata was so easy to make! And this one is so cute. We usually end up buying them for birthday parties, now I'll be making them. Thanks for sharing the process!
They sure are easy - you just need to plan ahead so you have enough time for it to dry. I've also seen pinatas made out of cardboard boxes and decorated!
That is an adorable pinata! I would've never thought of using a punching balloon. I love the oblong shape it gives the pinata.
Thanks - the punching balloons work perfectly because they can get blown up to such a large size and are a bit thicker plastic. It did work perfectly to make the oblong shape!
Hi, Shannon:
The pinata/DIY Toy Story Alien came out fantastic, it looks great and I'm sure the kids had a blast with it. Your step by step tutorial is most helpful as well.
Thanks! :)
Thanks! I'm glad the tutorial was helpful :)
So cute! I remember making pinatas as a kid, but I haven't done it with MY kids yet - with a B-day coming up I think we will do it soon!
It is a really fun project to do as a family :)
I love this! I did not realize piñatas were easy DIY projects. My kids would love this!
Pinatas are definitely a fairly easy DIY project - you just need to allow yourself enough time for the whole process :)