Toy Story Birthday Cake
After doing some Pinterest searching with Buddy for his Toy Story Party we finally agreed on a cake. The inspiration from the cake came from 3 Little Things. I liked that this cake didn’t include any fondant and it didn’t include any super crazy piping.
When I make cakes to decorate I use cake mixes – I find that the cake is a bit more dense and holds up better for decorating. When I use cake mixes I substitute the oil for melted butter, use milk instead of water and add one additional egg. I learned this trick from Pinterest – in most cases it says to melt and double the butter – this time I did not and I think it worked just as well (and is a little healthier).
So without further ado lets get down to making a three tiered birthday cake!
Materials Needed
- 16 inch cake board
- 14 inch cake pan
- 10 inch cake pan
- 8 inch cake pan
- 12 inch cake tier plastic spacer (optional)
- 10 inch cake tier plastic spacer (optional)
- Wilton icing bags (I use disposables)
- Wilton decorating tips: 3, 12, 18, 21, 32, 102
- 8 cake mixes (plus ingredients required on box – see modifications above)
- 4 or 5 batches of Wilton Buttercream (1 batch = 1 stick butter, 1/2 cup shortening, 4 cups confectionery sugar, 1 tsp vanilla, 2 tbs milk) ***This is an estimate as I used a few different fillings so I only made 3 batches of regular buttercream, a double batch of chocolate filling, and a 1/2 batch of mint buttercream
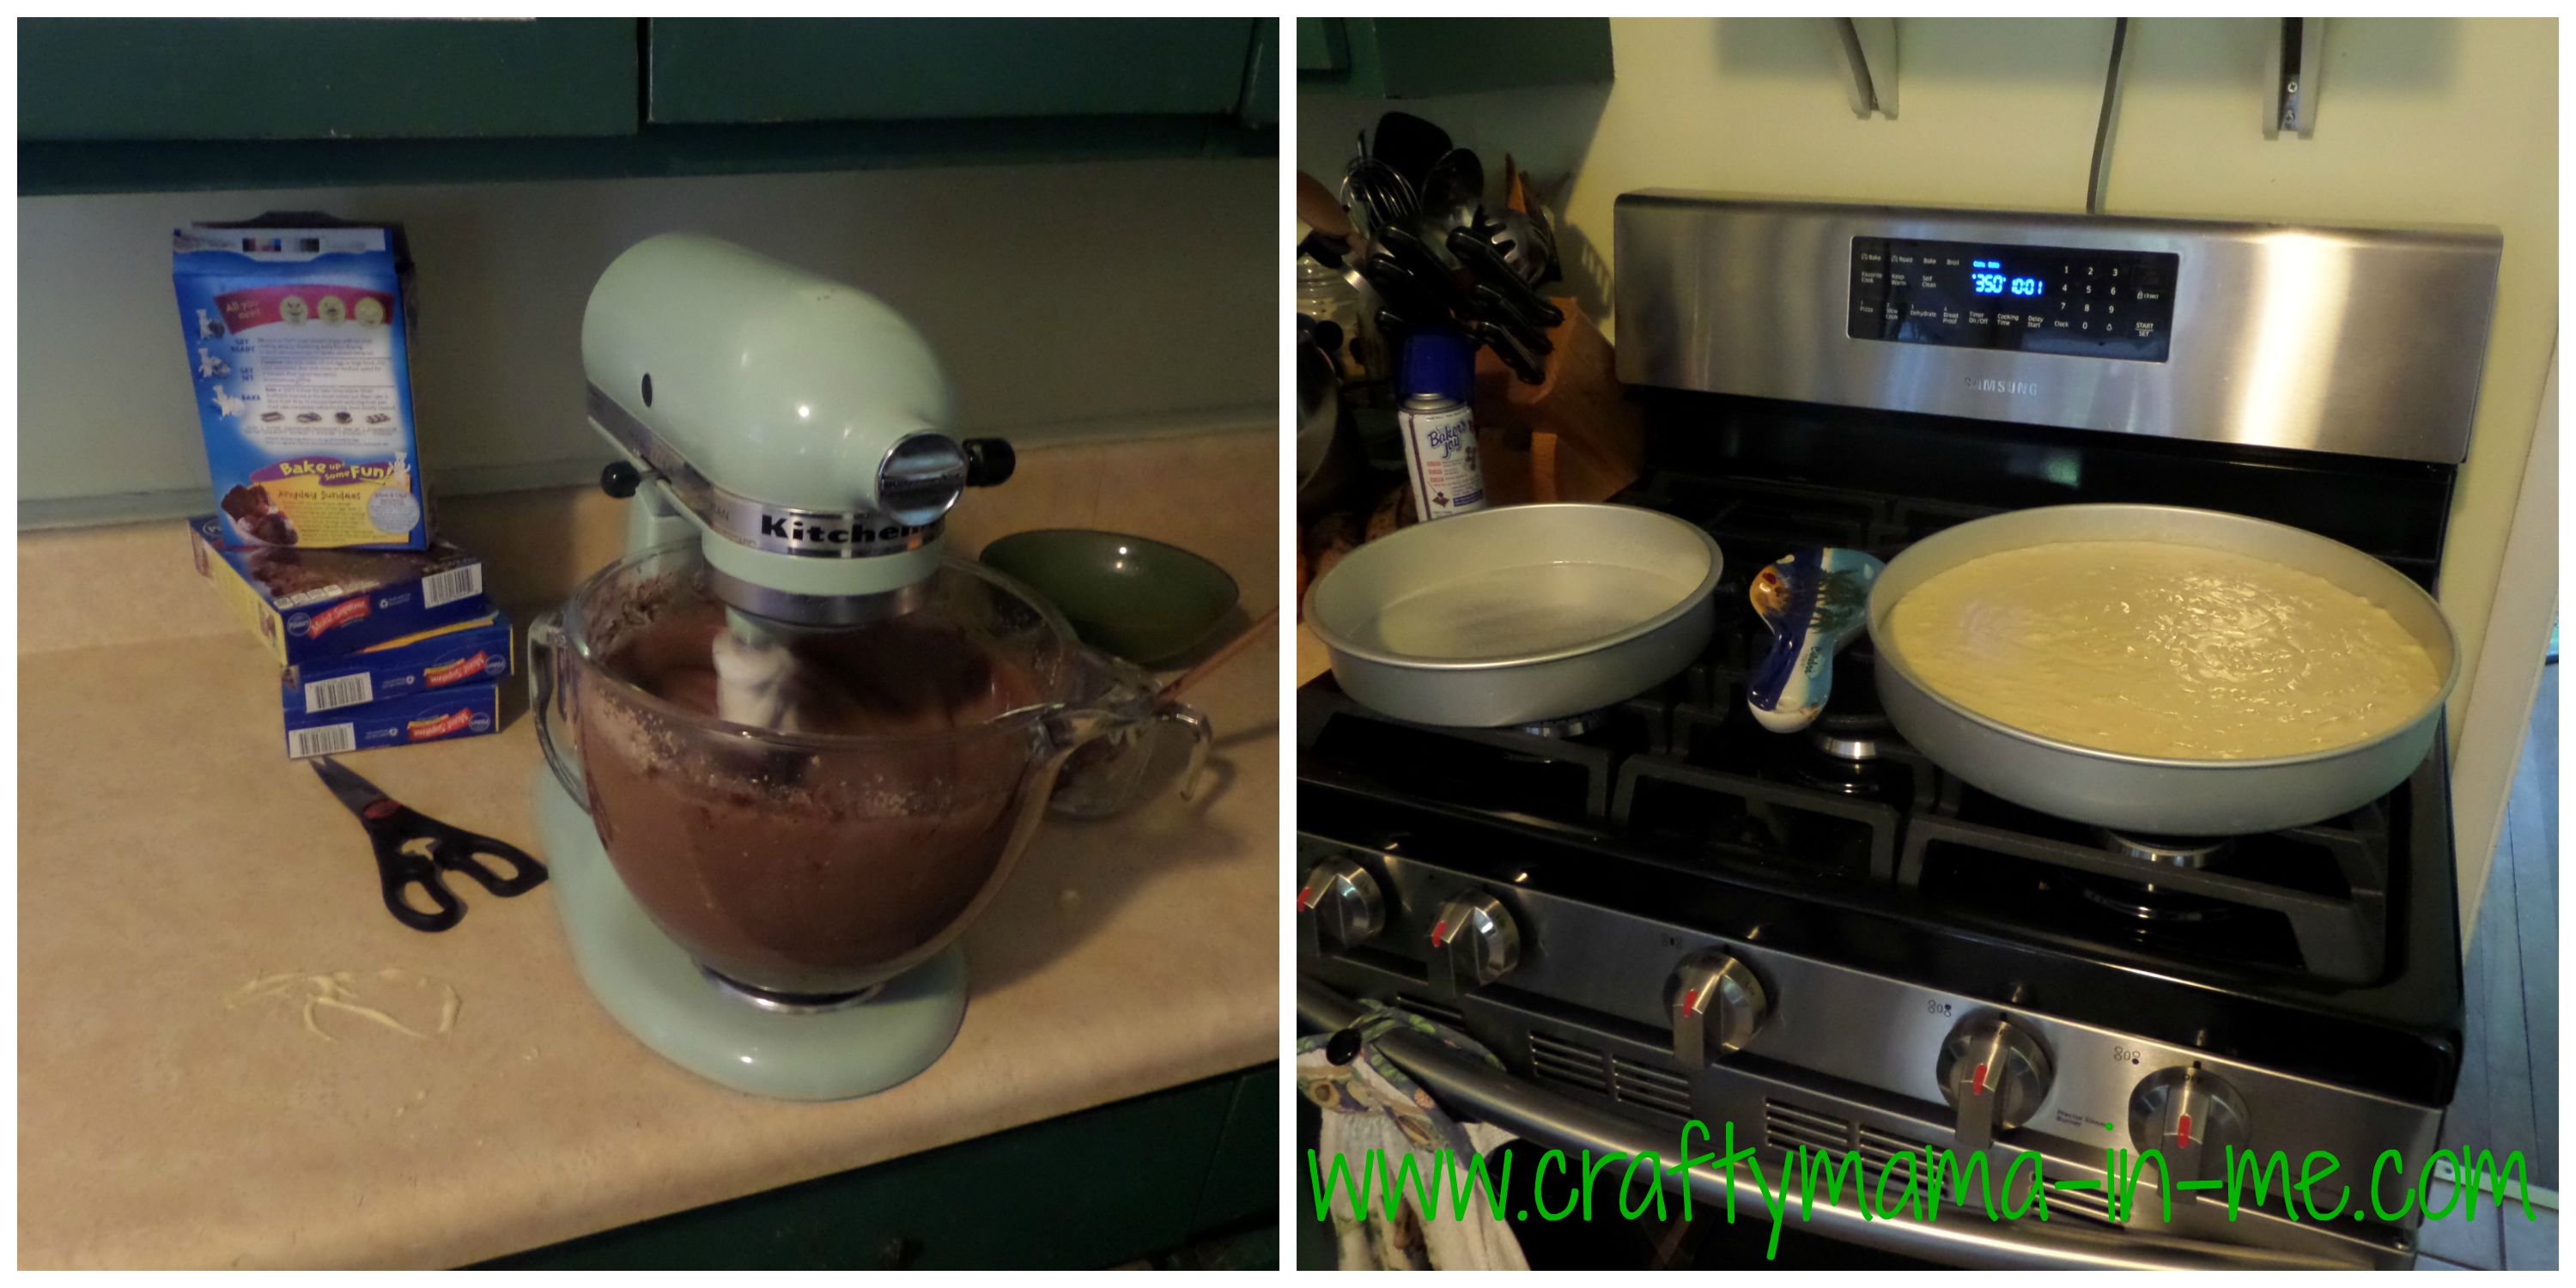
Step 1 – Baking
- Mix up two cake mixes for your 14 inch round cake pan – (mine baked in 40 minutes in my convection oven – the pan says 55 minutes in a regular oven)
- Mix up two more cake mixes – measure 6 cups (you should fill your pan 1/2 – 2/3 full) into your 10 inch round pan (I used three cake mixes to make both my 10 inch rounds)
- Since I have a convection oven I baked the 14 inch and 10 inch rounds together
- Let cool 5 minutes in pan and then remove from pan to cool completely on a cooling rack
- Repeat the process so you have two 14 inch round cakes and two 10 inch round cakes
- Mix one additional cake mix to make 2- 8 inch round cakes
- Let cool 5 minutes in pan and then remove from pan to cool completely on a cooling rack
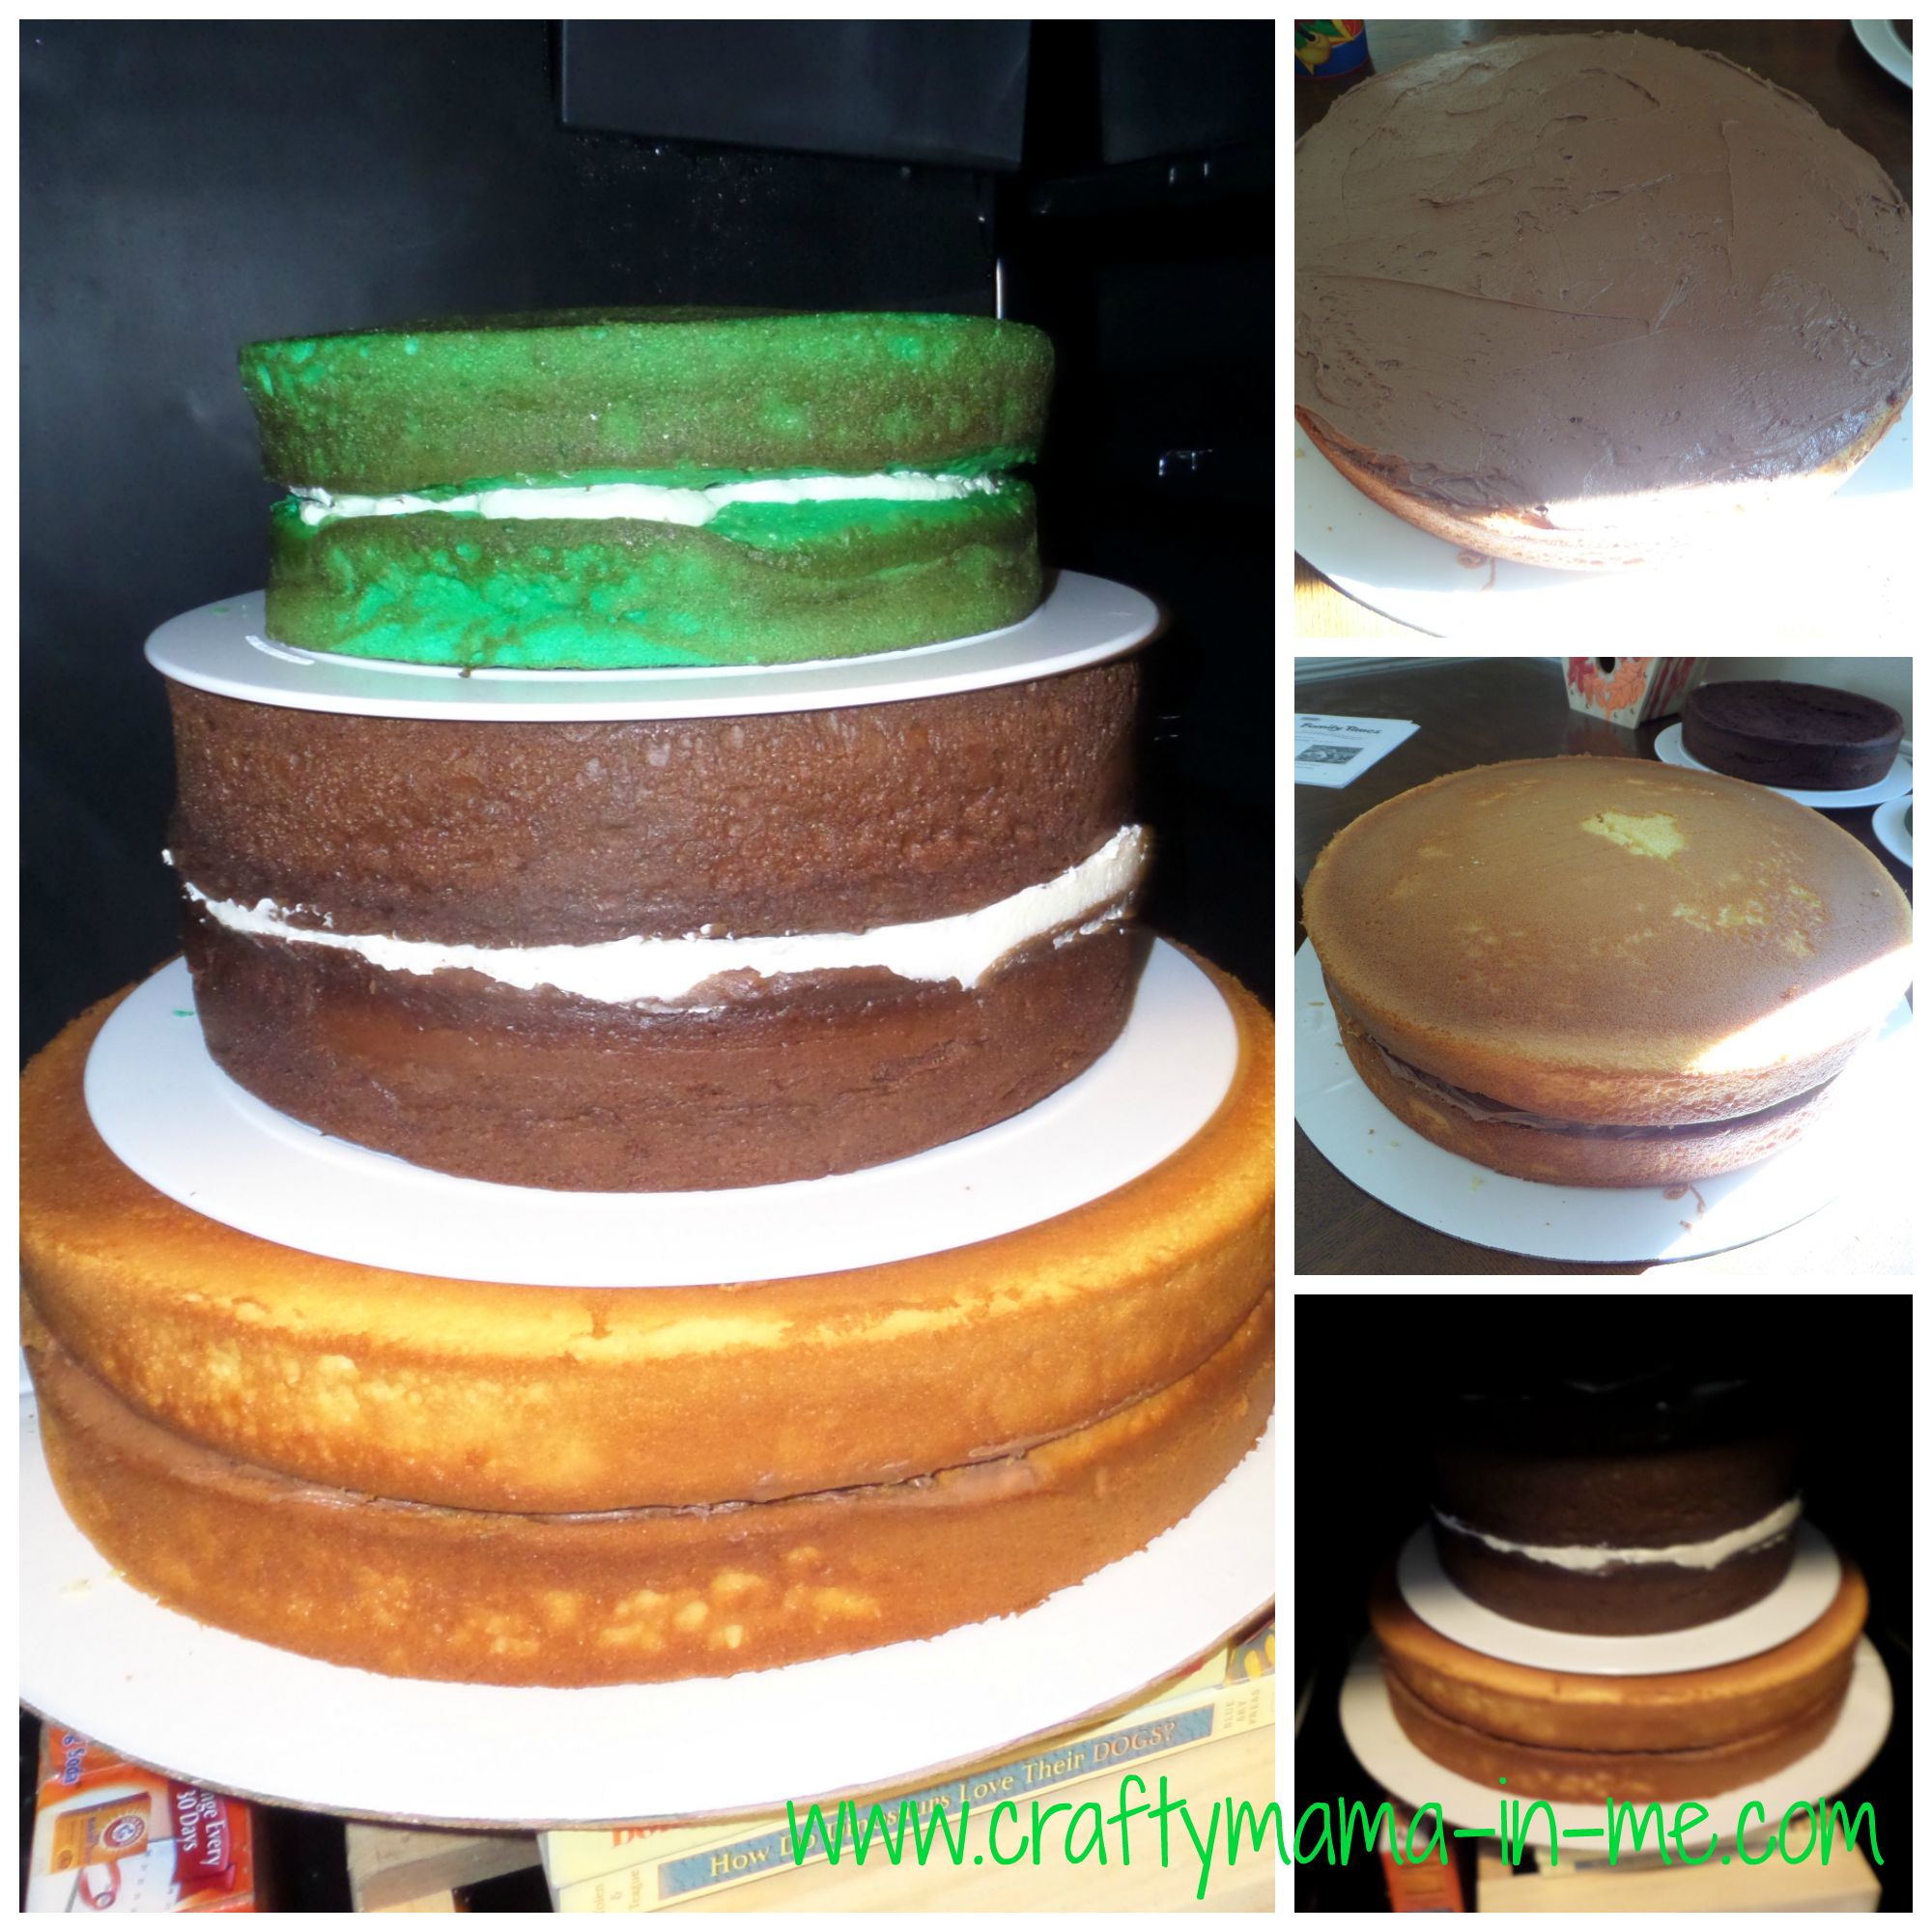
- My layers were as follows:
- 2 – 14 inch rounds of yellow cake
- 2 – 10 inch rounds of chocolate cake
- 2 – 8 inch rounds of green cake (Buddy’s favorite color is green)
Step 2 – Frosting
- Mix up and refrigerate your frosting – you will use plain buttercream for decorating the cake but you can switch up the fillings in between the layers.
- I used a Mint Buttercream (the recipe can be found here) to fill the green cake (8 inch layer) – I made a half batch and didn’t use all of it.
- I used a creamy Chocolate Frosting (from my Betty Crocker cookbook) to fill the yellow cake (14 inch layer) – I made a double batch and had enough leftover to use for decorating my Woody cake layer
- I used plain buttercream to fill the chocolate cake (10 inch layer)
- You can premix your frosting if you would like – at this point I usually just mix it as I need it
Step 3 – Filling/Crumb Coat
- Level your cake rounds prior to filling (make them flat if they baked with a rounded edge on top)
- Start on the bottom layer (14 inch round)
- Place one 14 inch round on the 16 inch cake board
- Put the filling on top of the cake
- Sandwich the filling with the second 14 inch round
- Crumb coat the cake (if desired – I didn’t do this)
- Repeat for each layer – placing on plastic spacer (if you are using – otherwise you would not want to fill until you are ready to stack your layers after fully decorating)
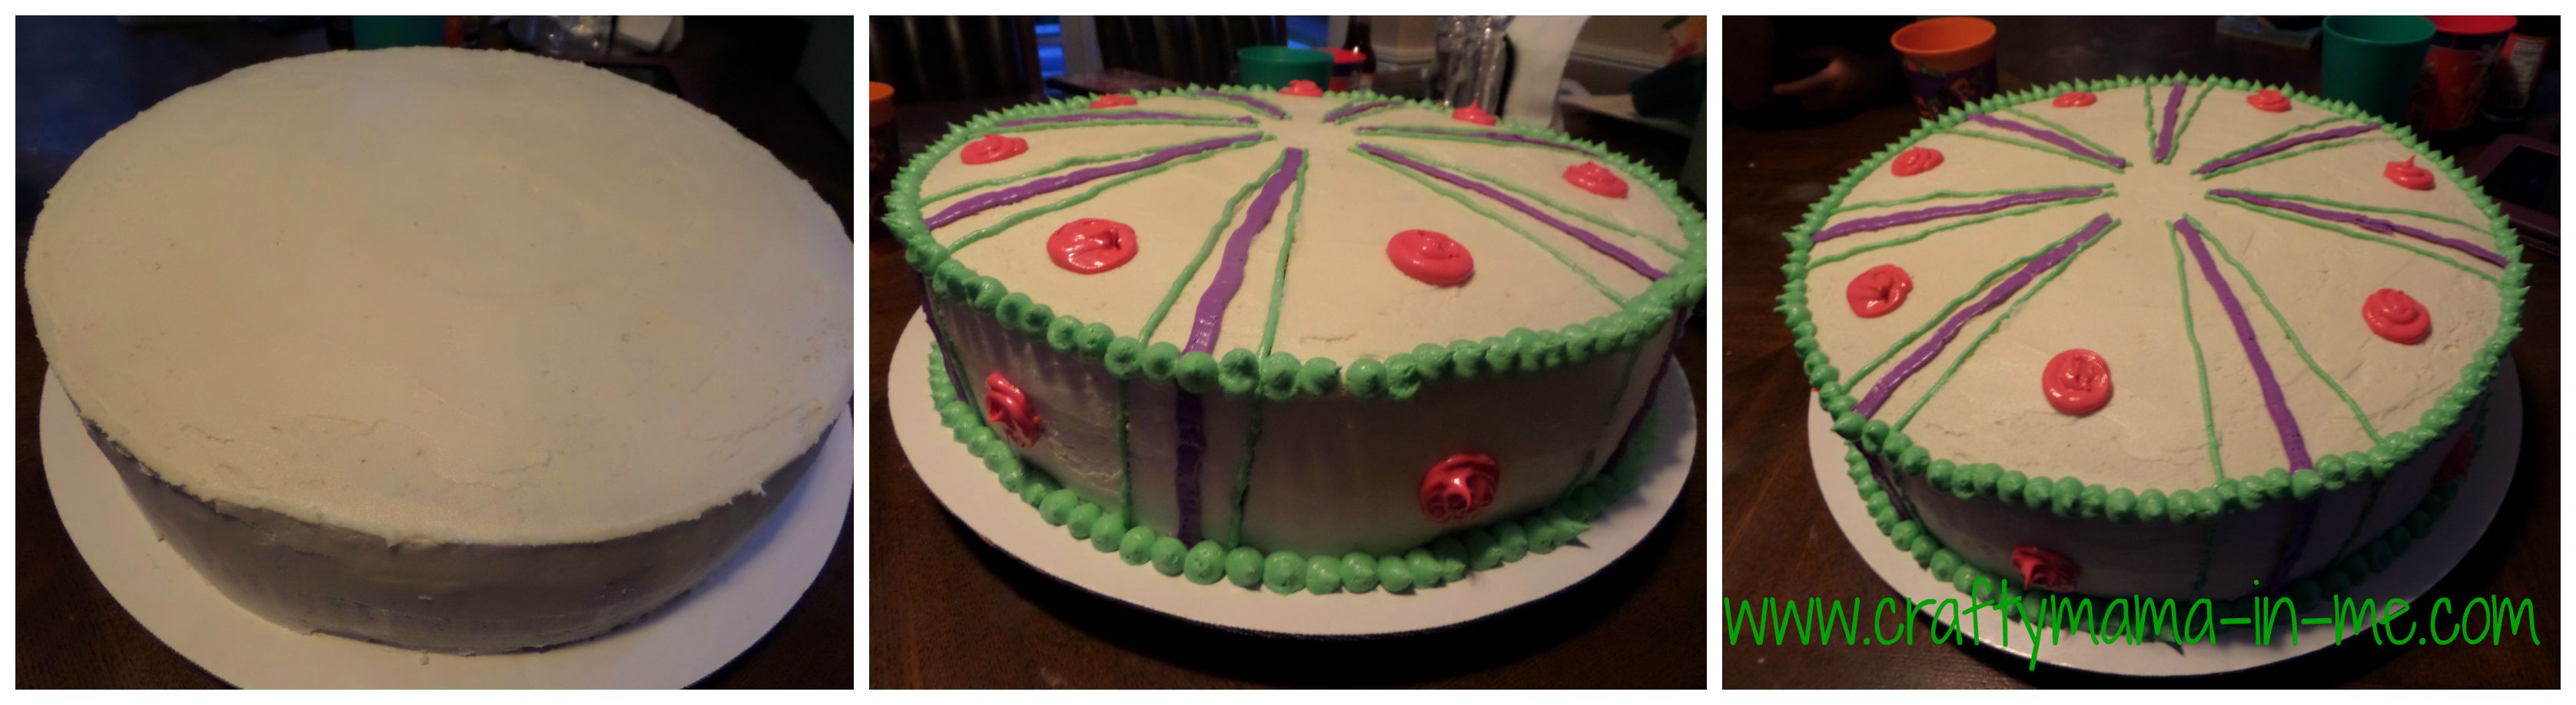
Step 4 – Decorate the Buzz Lightyear Layer
- Frost the entire layer with white frosting – get it as smooth as you can
- Use a straight clean blade (butter knife, cake knife) and make lines in the white frosting to use as a template for your piping
- Use the end of a large decorating tip to make circle templates on the cake
- Using Wilton food coloring make green frosting for the lines and borders
- Using Wilton food coloring make purple frosting for the lines
- Using Wilton food coloring make red frosting for the circles
- Use Wilton decorating tip #3 to pipe the green lines
- Use Wilton decorating tip #102 to pipe the purple lines
- Use Wilton decorating tip #12 to pipe in the red circles
- Use Wilton decorating tip #12 to pipe the top and bottom borders (make the circles a little larger on the bottom then on the top)
- Place this layer in the refrigerator
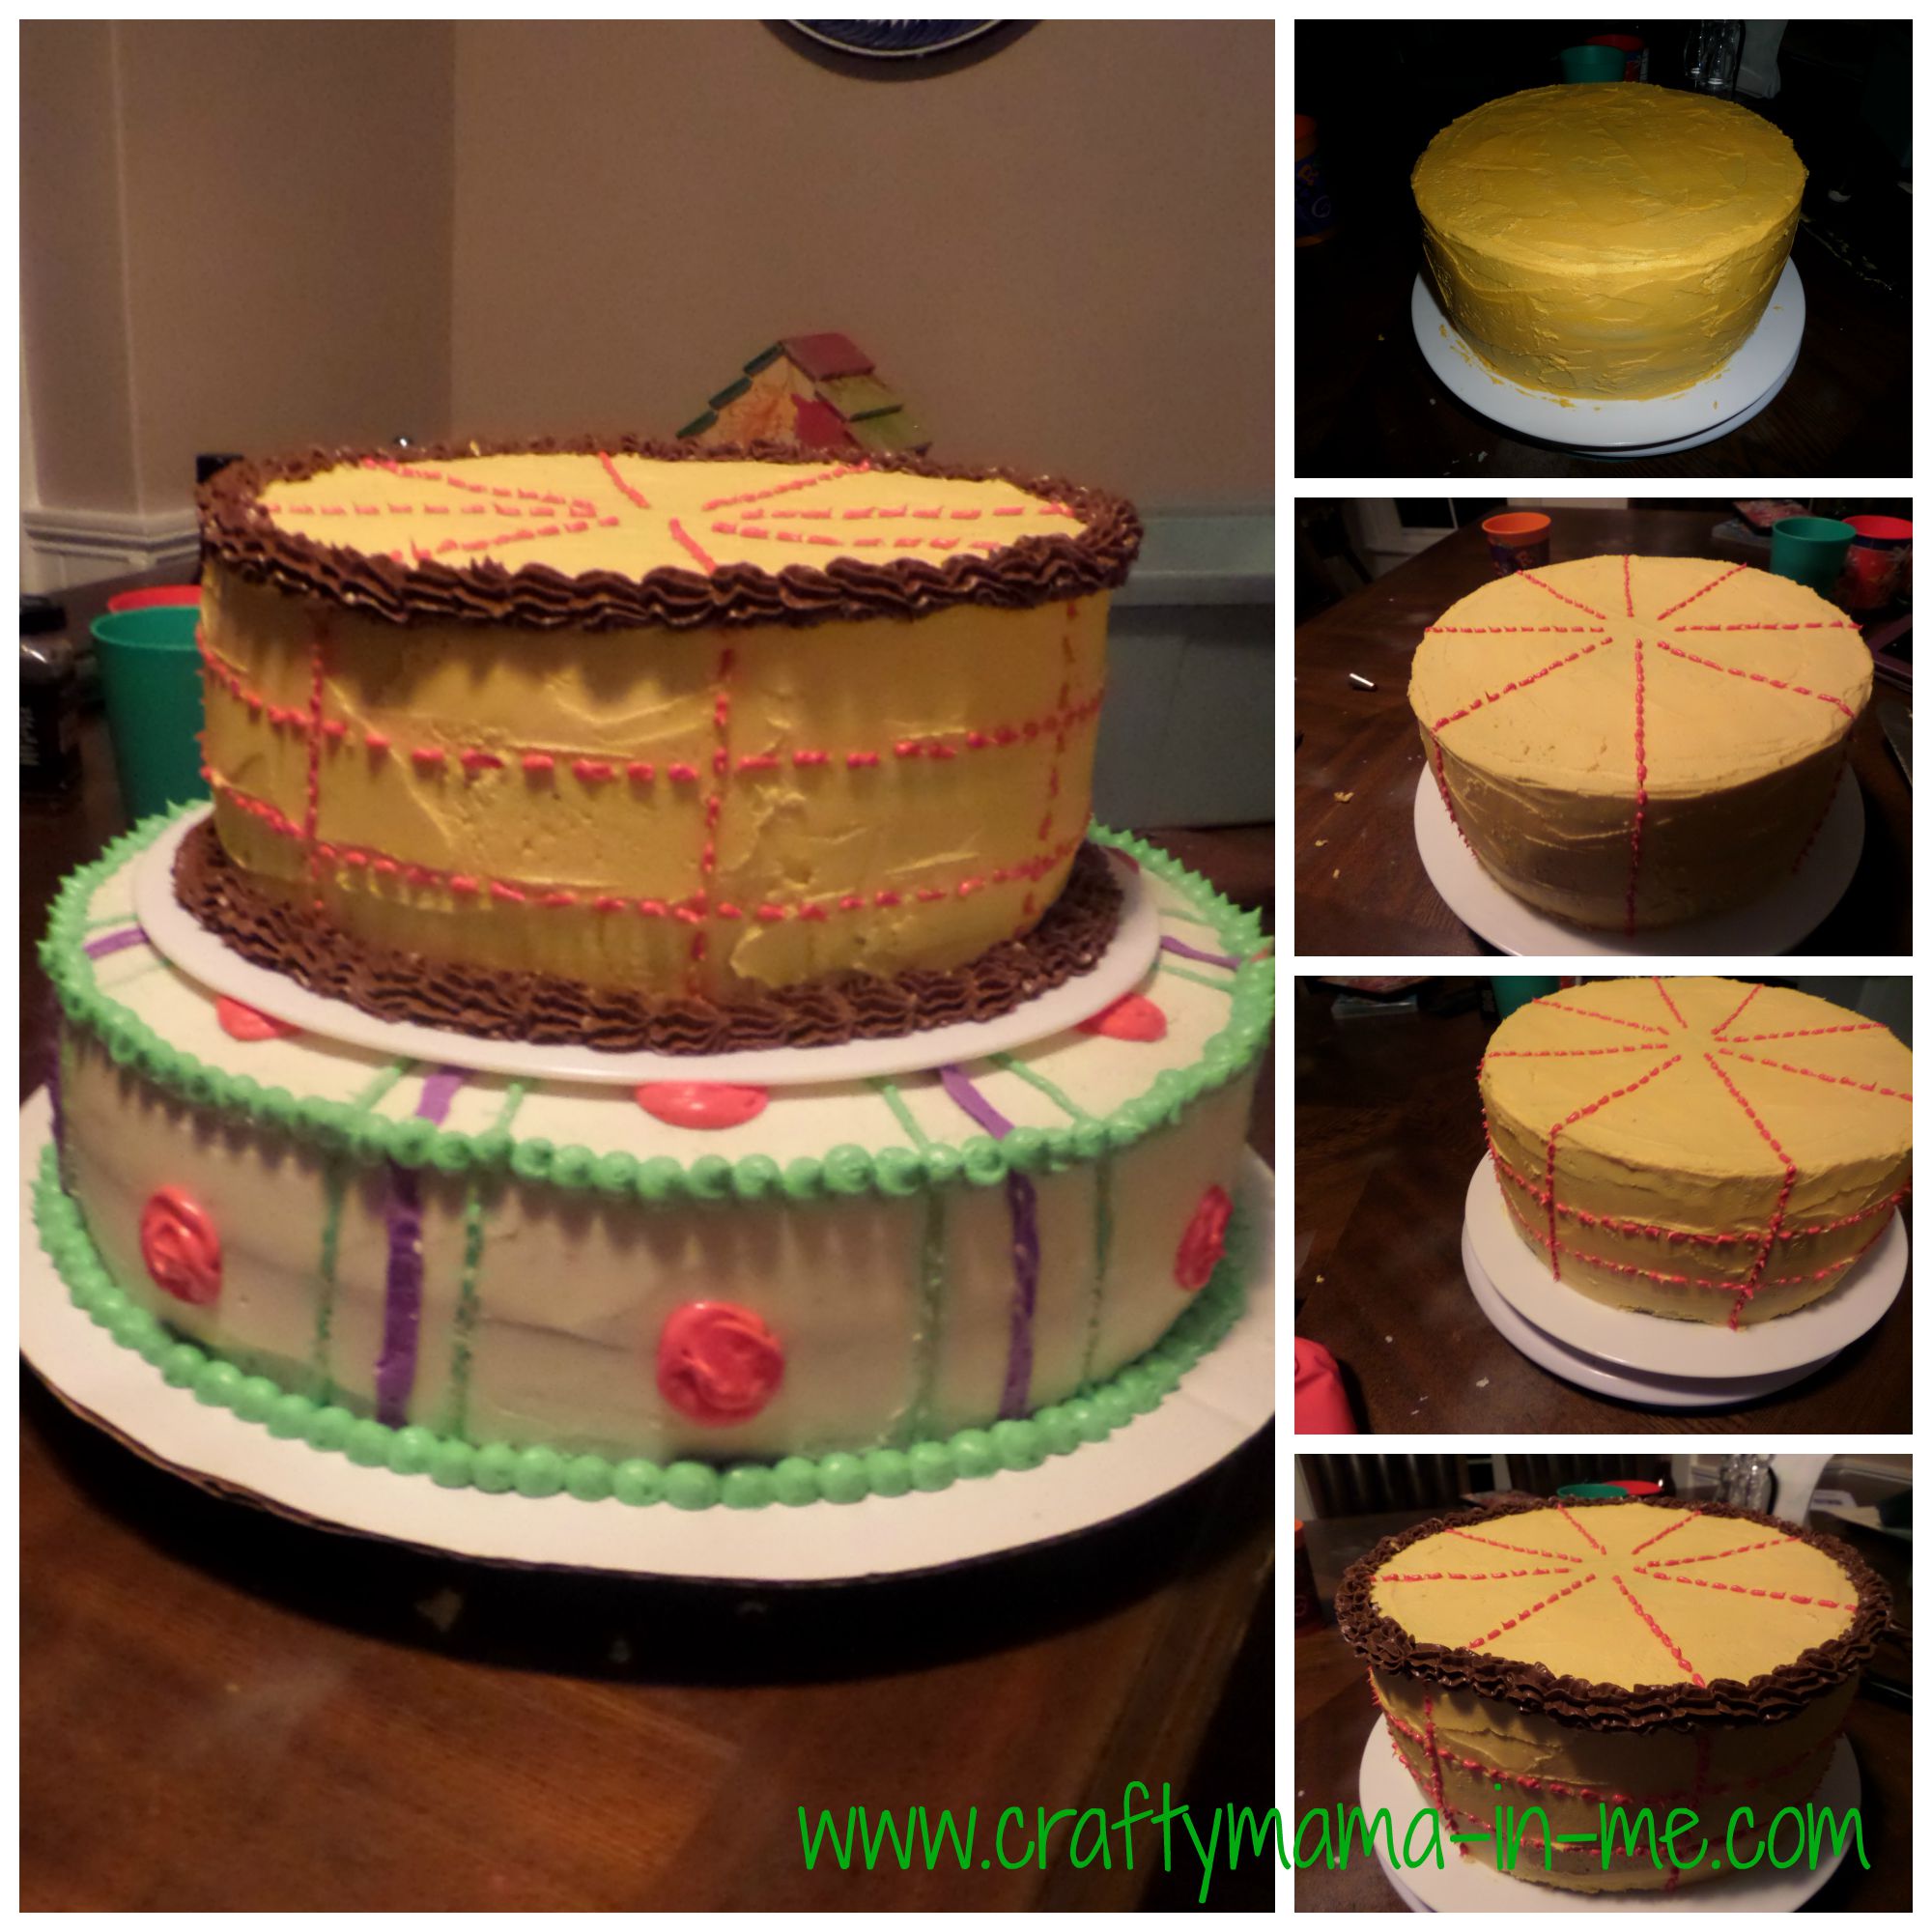
Step 5 – Decorate the Woody Layer
- Using Wilton food coloring make yellow frosting to frost the entire layer
- Use a straight clean blade and make lines in the yellow frosting to use for a template for piping the red lines
- Using Wilton food coloring make red frosting to pipe on the lines
- Use Wilton decorating tip #3 to make the dashes that form the red lines
- Using Wilton tip #21 to pipe the brown (I used chocolate frosting – you could just make brown frosting) borders around the top and bottom of the layer
- Remove the Buzz Lightyear layer from the refrigerator, center the Woody layer above it and put it down gently (since I used the spacer plates I didn’t put additional frosting before I sat the cake down – if you stack the cake directly on top you would want to use supporting dowels and additional frosting to adhere the cakes together).
- Place cake back in refrigerator
Step 6 – Decorate the Andy’s Room Layer
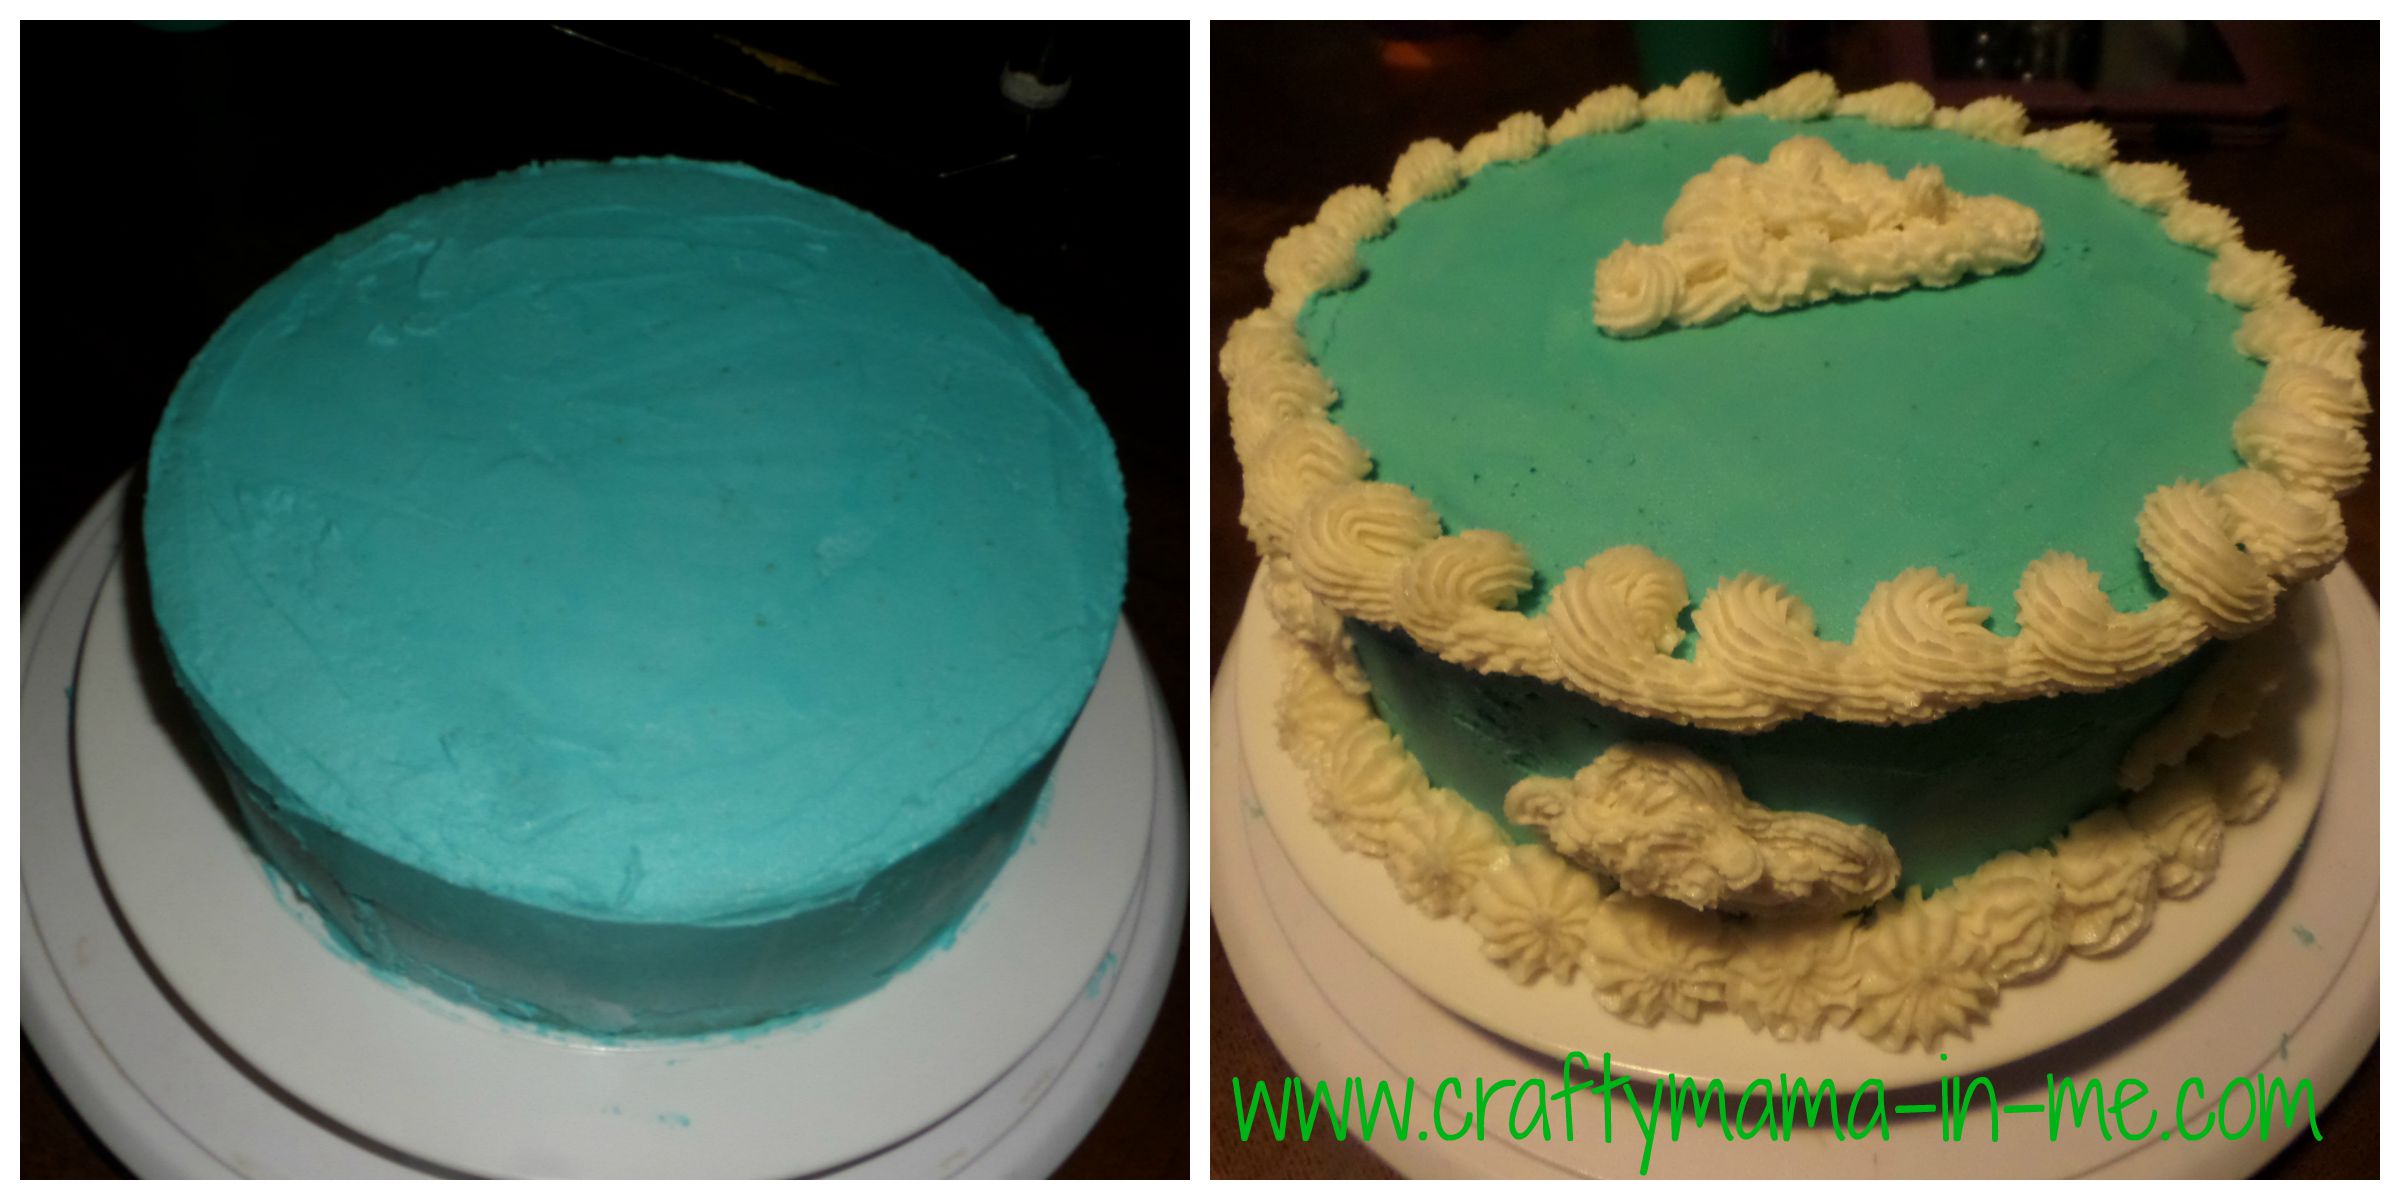
- Using Wilton food coloring make sky blue frosting to frost this layer
- Using Wilton decorating tip #18 pipe on white clouds
- Using Wilton decorating tip #32 pipe on the white borders around the top and bottom of the layer
- Remove the cake from the refrigerator, center the top layer and place it gently (see directions above if you are not using spacer plates)
Step 7 – Finishing Touches
The day of the event I added the birthday candles, Toy Story figures and wrote my sons name on top. It was very humid here when I made the cake which is why I had to refrigerate frequently. In Maine I typically don’t refrigerate my cakes while decorating.
The cake turned out great – and best of all Buddy loved it 🙂
View Comments (2)
This is one gorgeous cake! I can't believe you made it in your own kitchen. It looks very professional. No wonder Buddy loved it.
Thank you! I really enjoy decorating cakes and seeing how happy it makes the kids makes it that much more fun :)