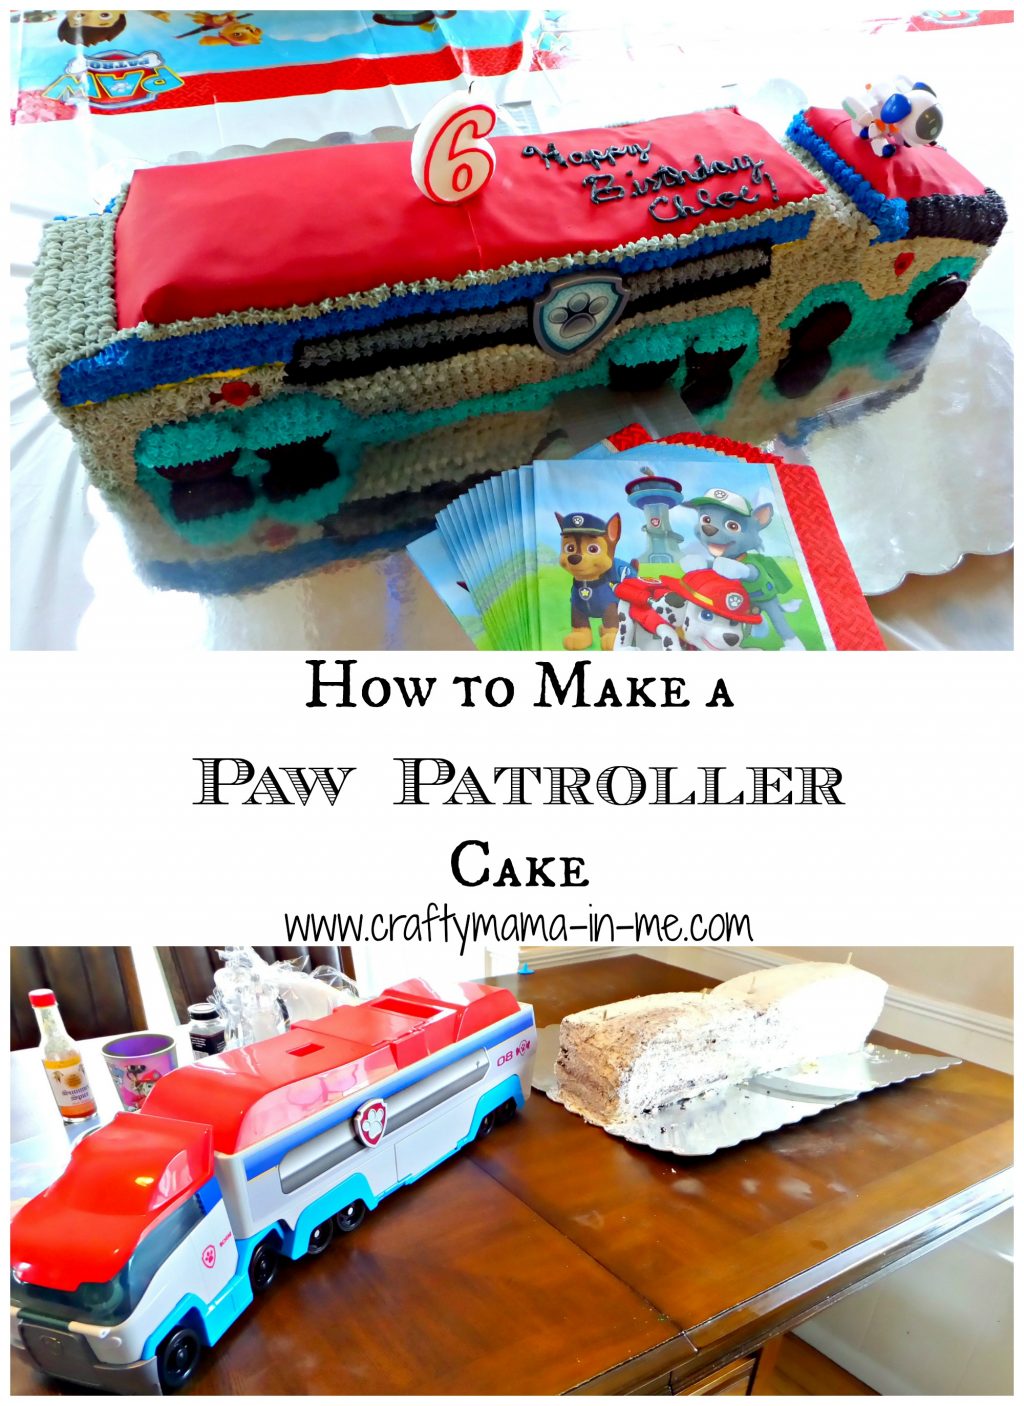
How to Make a Paw Patroller Cake
Does your child love Paw Patrol?? Both of mine sure do! We just celebrated Boo Boo’s 6th birthday in Paw Patrol style 🙂 Keep reading to learn how to make a Paw Patroller Cake below.
Materials Needed
- 8″x 10″ cake pan
- 4 box cake mixes – any flavor (you can do a cake from scratch but I find the density to decorate is better with a box cake mix)
- Filling for the layers of the cake (I used both Chocolate frosting and Wilton Buttercream – I ended up making a triple batch of buttercream and a double batch of Chocolate Frosting)
- Large cake board (I taped two together to get the size I needed)
- Wilton tips: 13 (star tip) and 3 (small circle tip)
- Wilton Blue, Yellow, and Black Food Coloring Gels
- Wilton Piping Bags (I use the disposable plastic bags)
- Two Wilton Red Sugar Sheets (they can be purchased at most craft stores – I saw them at Hobby Lobby and A.C. Moore)
- Oreos (for the wheels)
- Badge (I washed one that we had on had and “borrowed” it)
Instructions
- Prepare and bake the cakes according to the box directions
- Allow the cakes to cool completely
- Cut each cake in half lengthwise (leaving you with two 4″ x 10″ halves)
- Place two cake sections on the cake board creating a 4″ x 20″ long base layer
- Put frosting on top of the base layer and stack the next two sections on top
- Repeat until you have 4 layers of cake
- Dirty ice the cake (cover the entire cake with a small amount of frosting to hold the crumbs down and gave you a smooth base to decorate)
- Insert dowels as supports (optional – I did this overnight to make sure the cake didn’t lean and removed them the next day when I started decorating)
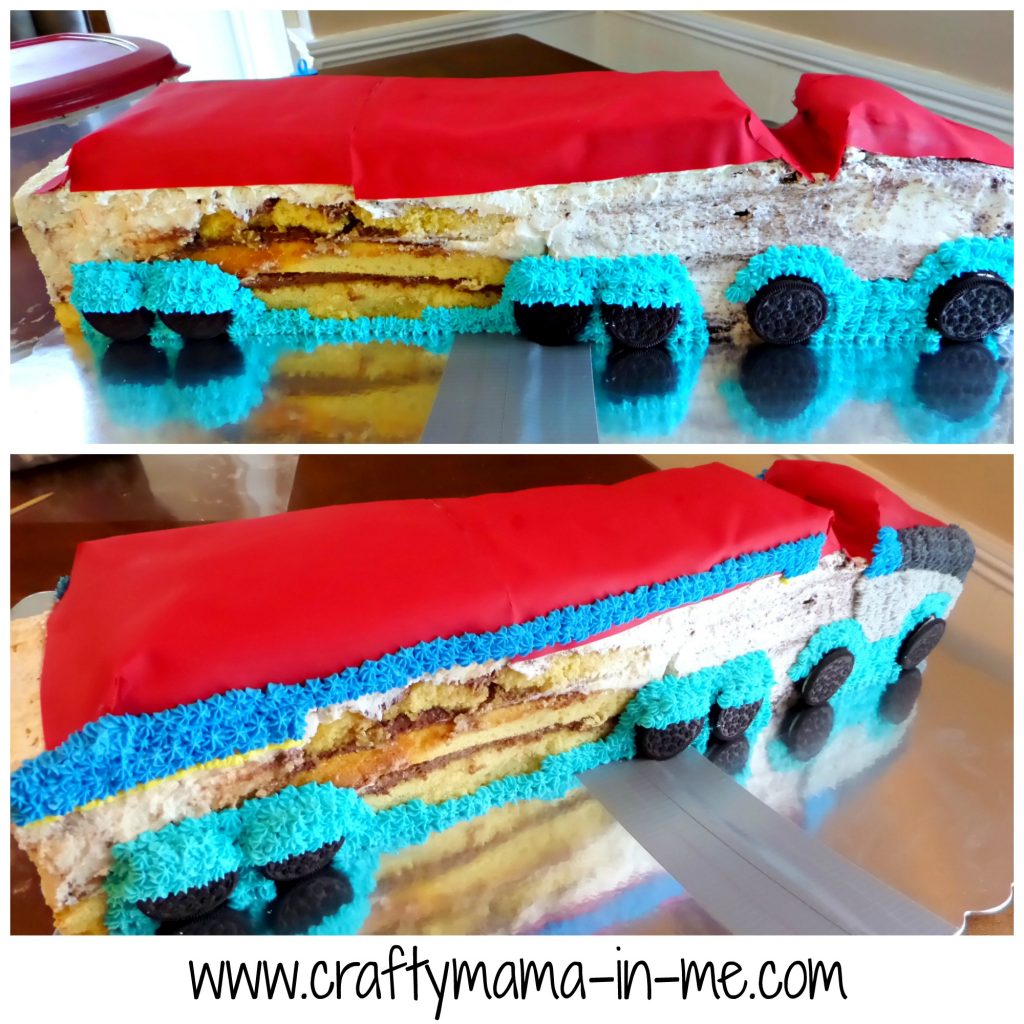
- Cut and apply the red sugar sheet to the roof (measure carefully as you can’t re-cut and moving once stuck is pretty difficult)
- Mix your frosting colors (bright blue, dark blue, yellow, light grey and dark grey)
- Attach the wheels (I applied a dab of frosting to the backs and stuck them on)
- Start piping (this is the time consuming part!) – I used Wilton star tip #13 for all of the piping other than the yellow line and the writing on top of the cake which I used tip #3 for.
- I started with the bright blue on the bottom and then moved to the dark blue on the top and then filled in the rest.
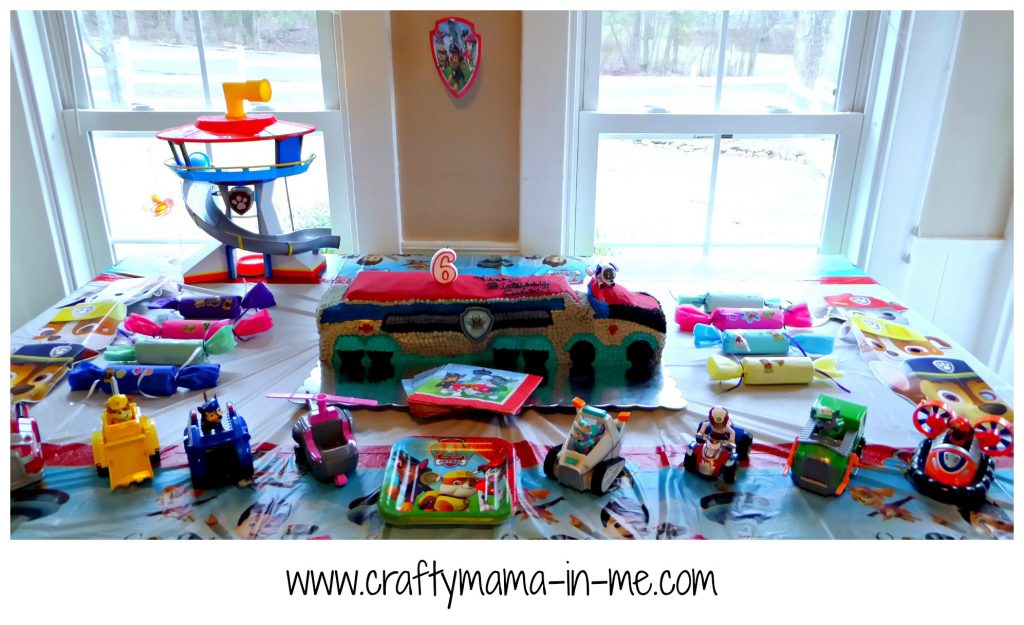
- I had the Paw Patroller toy sitting next to me on the table to use as a guideline for where to pipe what color – you could also print out a picture
- The day of the party I added the candle, piped on a Happy Birthday Message, and added Robo Dog to the top of the cake
I love making cakes for my kids! My daughter was thrilled and that makes the prep time worth it 🙂 Be prepared to spend a large amount of time from baking to decorating (at least a day). I usually bake and dirty ice one day and decorate another to allow myself time to do other things as well – otherwise the cake would take a full day.
Let me know if you try to make a Paw Patroller! I would also love to hear about any other elaborate cakes you have made for your kids. See below for a few of the others I have made.
Also take a look at my Cake Decorating board on Pinterest:
Follow Crafty Mama in ME’s board Cake decorating on Pinterest.
View Comments (2)
How did you get the dark blue and light blue colors?
Wilton has a ton of different colors to choose from - also if you use more or less dye you can get varying colors!